
head over to the blog of dbi services to read the second post of the series:
getting started with postgres plus advanced server (2) – setting up a backup and recovery server
head over to the blog of dbi services to read the second post of the series:
getting started with postgres plus advanced server (2) – setting up a backup and recovery server

I did several posts around postgresql and postgres plus advanced server in the past. what is missing is a beginners guide on how to get postgres plus advanced server up and running including a solution for backup and recovery, high availability and monitoring. so I thought I’d write a guide on how to do that, consisting of:
As this is the first post of the series this is about getting ppas installed and creating the first database cluster.
Obviously the first thing to do is to install an operating system. several of these are supported, just choose the one you like. An example setup can be found here.
So, once ppas was downloaded and transferred to the system where it is supposed to be installed we can start.
there are several ways to get ppas installed on the system. before you begin java should be installed. for yum based distributions this is done by:
yum install java
starting the installation is just a matter of extracting the the file and executing it:
[root@oel7 tmp]# ls
ppasmeta-9.4.1.3-linux-x64.tar.gz
[root@oel7 tmp]# tar -axf ppasmeta-9.4.1.3-linux-x64.tar.gz
[root@oel7 tmp]# ls
ppasmeta-9.4.1.3-linux-x64  ppasmeta-9.4.1.3-linux-x64.tar.gz
[root@oel7 tmp]# ppasmeta-9.4.1.3-linux-x64/ppasmeta-9.4.1.3-linux-x64.run


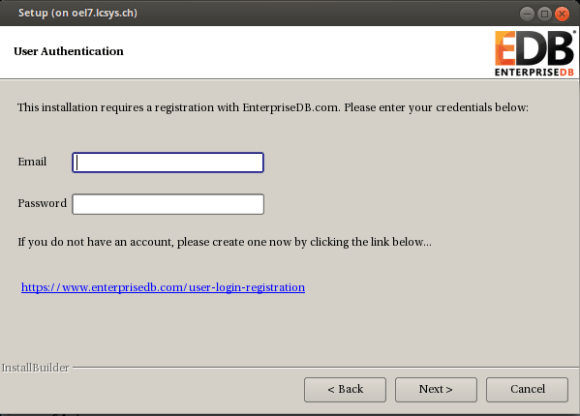
provide the username and password you used for downloading the product:


done.
if you do not want to use the graphical user interface you can launch the installer in interactive text mode:
# ppasmeta-9.4.1.3-linux-x64/ppasmeta-9.4.1.3-linux-x64.run --mode text
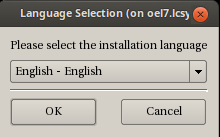
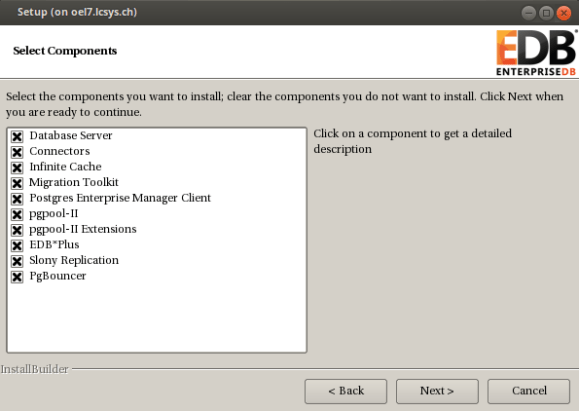
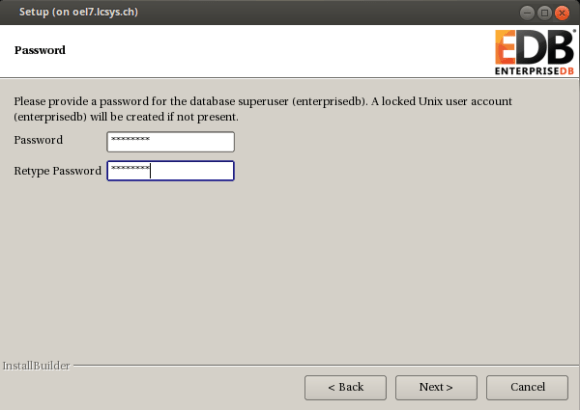
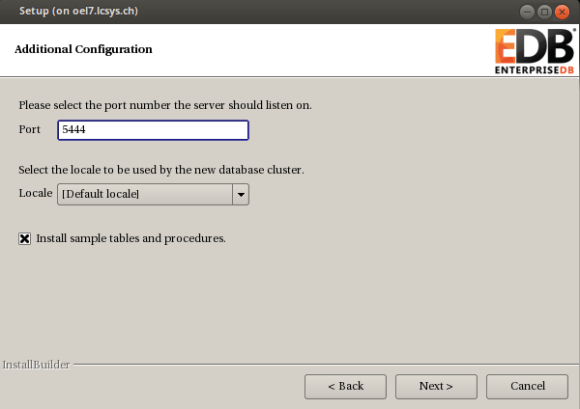
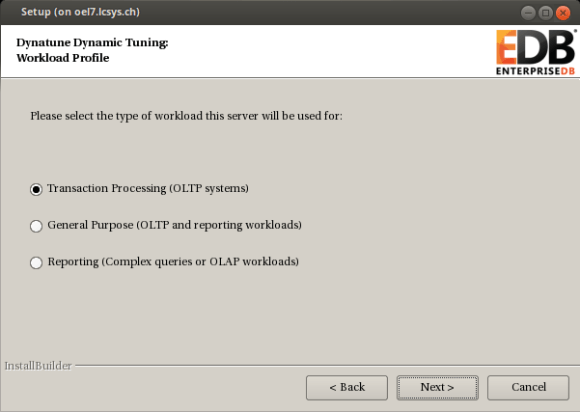
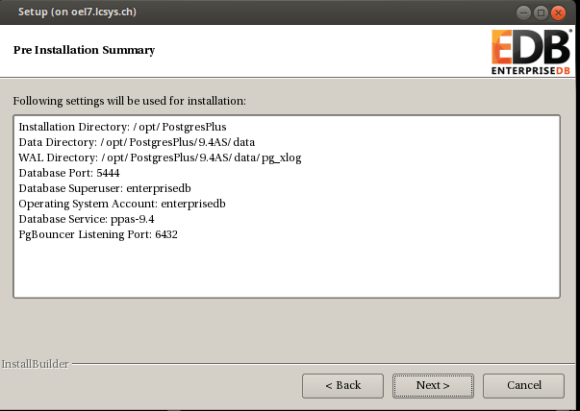
either go with the default options or adjust what you like. the questions should be self explaining:
Language Selection

Please select the installation language
[1] English - English
[2] Japanese - 日本語
[3] Simplified Chinese - 简体中文
[4] Traditional Chinese - 繁体中文
[5] Korean - 한국어
Please choose an option [1] : 1
----------------------------------------------------------------------------
Welcome to the Postgres Plus Advanced Server Setup Wizard.

----------------------------------------------------------------------------
Please read the following License Agreement. You must accept the terms of this
agreement before continuing with the installation.

Press [Enter] to continue:
.....
.....
Press [Enter] to continue:

Do you accept this license? [y/n]: y

----------------------------------------------------------------------------
User Authentication

This installation requires a registration with EnterpriseDB.com. Please enter
your credentials below. If you do not have an account, Please create one now on
https://www.enterprisedb.com/user-login-registration

Email [xx.xx@xx.xxx]:

Password : xxxxx

----------------------------------------------------------------------------
Please specify the directory where Postgres Plus Advanced Server will be
installed.

Installation Directory [/opt/PostgresPlus]:

----------------------------------------------------------------------------
Select the components you want to install.

Database Server [Y/n] :y

Connectors [Y/n] :y

Infinite Cache [Y/n] :y

Migration Toolkit [Y/n] :y

Postgres Enterprise Manager Client [Y/n] :y

pgpool-II [Y/n] :y

pgpool-II Extensions [Y/n] :y

EDB*Plus [Y/n] :y

Slony Replication [Y/n] :y

PgBouncer [Y/n] :y

Is the selection above correct? [Y/n]: y

----------------------------------------------------------------------------
Additional Directories

Please select a directory under which to store your data.

Data Directory [/opt/PostgresPlus/9.4AS/data]:

Please select a directory under which to store your Write-Ahead Logs.

Write-Ahead Log (WAL) Directory [/opt/PostgresPlus/9.4AS/data/pg_xlog]:

----------------------------------------------------------------------------
Configuration Mode

Postgres Plus Advanced Server always installs with Oracle(R) compatibility features and maintains full PostgreSQL compliance. Select your style preference for installation defaults and samples.

The Oracle configuration will cause the use of certain objects  (e.g. DATE data types, string operations, etc.) to produce Oracle compatible results, create the same Oracle sample tables, and have the database match Oracle examples used in the documentation.

Configuration Mode

[1] Oracle Compatible
[2] PostgreSQL Compatible
Please choose an option [1] : 1

----------------------------------------------------------------------------
Please provide a password for the database superuser (enterprisedb). A locked
Unix user account (enterprisedb) will be created if not present.

Password :
Retype Password :
----------------------------------------------------------------------------
Additional Configuration

Please select the port number the server should listen on.

Port [5444]:

Select the locale to be used by the new database cluster.

Locale

[1] [Default locale]
......
Please choose an option [1] : 1

Install sample tables and procedures. [Y/n]: Y

----------------------------------------------------------------------------
Dynatune Dynamic Tuning:
Server Utilization

Please select the type of server to determine the amount of system resources
that may be utilized:

[1] Development (e.g. a developer's laptop)
[2] General Purpose (e.g. a web or application server)
[3] Dedicated (a server running only Postgres Plus)
Please choose an option [2] : 2

----------------------------------------------------------------------------
Dynatune Dynamic Tuning:
Workload Profile

Please select the type of workload this server will be used for:

[1] Transaction Processing (OLTP systems)
[2] General Purpose (OLTP and reporting workloads)
[3] Reporting (Complex queries or OLAP workloads)
Please choose an option [1] : 2

----------------------------------------------------------------------------
Advanced Configuration

----------------------------------------------------------------------------
PgBouncer Listening Port [6432]:

----------------------------------------------------------------------------
Service Configuration

Autostart PgBouncer Service [Y/n]: n

Autostart pgAgent Service [Y/n]: n

Update Notification Service [Y/n]: n

The Update Notification Service informs, downloads and installs whenever
security patches and other updates are available for your Postgres Plus Advanced
Server installation.

----------------------------------------------------------------------------
Pre Installation Summary

Following settings will be used for installation:

Installation Directory: /opt/PostgresPlus
Data Directory: /opt/PostgresPlus/9.4AS/data
WAL Directory: /opt/PostgresPlus/9.4AS/data/pg_xlog
Database Port: 5444
Database Superuser: enterprisedb
Operating System Account: enterprisedb
Database Service: ppas-9.4
PgBouncer Listening Port: 6432

Press [Enter] to continue:

----------------------------------------------------------------------------
Setup is now ready to begin installing Postgres Plus Advanced Server on your
computer.

Do you want to continue? [Y/n]: Y

----------------------------------------------------------------------------
Please wait while Setup installs Postgres Plus Advanced Server on your computer.

 Installing Postgres Plus Advanced Server
 0% ______________ 50% ______________ 100%
 ########################################
 Installing Database Server ...
 Installing pgAgent ...
 Installing Connectors ...
 Installing Migration Toolkit ...
 Installing EDB*Plus ...
 Installing Infinite Cache ...
 Installing Postgres Enterprise Manager Client ...
 Installing Slony Replication ...
 Installing pgpool-II ...
 Installing pgpool-II Extensions ...
 Installing PgBouncer ...
 Installing StackBuilder Plus ...
 #

----------------------------------------------------------------------------
Setup has finished installing Postgres Plus Advanced Server on your computer.
done.
another option is to use the unattended more by providing all the parameters on the command line or by creating a configuration file. this is an example for providing the parameters on the command line. most of the parameters can be skipped and the default is applied:
ppasmeta-9.4.1.3-linux-x64/ppasmeta-9.4.1.3-linux-x64.run --mode unattended \
   --enable-components dbserver,connectors,infinitecache,edbmtk,pem_client,\
                       pgpool,pgpoolextension,edbplus,replication,pgbouncer \
   --installer-language en --superaccount enterprisedb \
   --servicename ppas-9.4 --serviceaccount enterprisedb \
   --prefix /opt/PostgresPlus --datadir /opt/PostgresPlus/9.4AS/data \
   --xlogdir /opt/PostgresPlus/9.4AS/data/pg_xlog \
   --databasemode oracle --superpassword enterprisedb
   --webusername xx.xx@xx.xxx --webpassword xxxxx

 Installing Database Server ...
 Installing pgAgent ...
 Installing Connectors ...
 Installing Migration Toolkit ...
 Installing EDB*Plus ...
 Installing Infinite Cache ...
 Installing Postgres Enterprise Manager Client ...
 Installing Slony Replication ...
 Installing pgpool-II ...
 Installing pgpool-II Extensions ...
 Installing PgBouncer ...
 Installing StackBuilder Plus ...X11 connection rejected because of wrong authentication.
done.
no matter which installation method was chosen the result is that ppas is installed and the database cluster is initialized. you might check the processes:
# ps -ef | grep postgres
enterpr+ 12759     1  0 12:03 ?        00:00:00 /opt/PostgresPlus/9.4AS/bin/edb-postgres -D /opt/PostgresPlus/9.4AS/data
enterpr+ 12760 12759  0 12:03 ?        00:00:00 postgres: logger process
enterpr+ 12762 12759  0 12:03 ?        00:00:00 postgres: checkpointer process
enterpr+ 12763 12759  0 12:03 ?        00:00:00 postgres: writer process
enterpr+ 12764 12759  0 12:03 ?        00:00:00 postgres: wal writer process
enterpr+ 12765 12759  0 12:03 ?        00:00:00 postgres: autovacuum launcher process
enterpr+ 12766 12759  0 12:03 ?        00:00:00 postgres: stats collector process
enterpr+ 12882 12759  0 12:03 ?        00:00:00 postgres: enterprisedb edb ::1[45984] idle
root     13866  2619  0 12:15 pts/0    00:00:00 grep --color=auto postgres
or the services that got created:
# chkconfig --list | grep ppas

Note: This output shows SysV services only and does not include native
      systemd services. SysV configuration data might be overridden by native
      systemd configuration.

      If you want to list systemd services use 'systemctl list-unit-files'.
      To see services enabled on particular target use
      'systemctl list-dependencies [target]'.

ppas-9.4       	0:off	1:off	2:on	3:on	4:on	5:on	6:off
ppas-agent-9.4 	0:off	1:off	2:on	3:on	4:on	5:on	6:off
ppas-infinitecache	0:off	1:off	2:off	3:off	4:off	5:off	6:off
ppas-pgpool    	0:off	1:off	2:off	3:off	4:off	5:off	6:off
ppas-replication-9.4	0:off	1:off	2:off	3:off	4:off	5:off	6:off
# ls -la /etc/init.d/ppas*
-rwxr-xr-x. 1 root root 3663 Apr 23 12:03 /etc/init.d/ppas-9.4
-rwxr-xr-x. 1 root root 2630 Apr 23 12:03 /etc/init.d/ppas-agent-9.4
-rwxr-xr-x. 1 root root 1924 Apr 23 12:04 /etc/init.d/ppas-infinitecache
-rwxr-xr-x. 1 root root 3035 Apr 23 12:04 /etc/init.d/ppas-pgpool
-rwxr-xr-x. 1 root root 3083 Apr 23 12:04 /etc/init.d/ppas-replication-9.4
as the account which installed the software should not be used to work with then database lets create an os account for doing the connections to the database:
# groupadd postgres
# useradd -g postgres postgres
# passwd postgres
Changing password for user postgres.
New password:
Retype new password:
passwd: all authentication tokens updated successfully.
ppas brings an environment file for setting all the environment variables, let’s source that so it will be available for future logins:
su - postgres
echo ". /opt/PostgresPlus/9.4AS/pgplus_env.sh" >> .bash_profile
once you login to the postgres account the environment is there:
$ env | grep PG
PGPORT=5444
PGDATABASE=edb
PGLOCALEDIR=/opt/PostgresPlus/9.4AS/share/locale
PGDATA=/opt/PostgresPlus/9.4AS/data
$ env | grep EDB
EDBHOME=/opt/PostgresPlus/9.4AS
now we are ready to login to the database:
$ psql -U enterprisedb
Password for user enterprisedb:
psql.bin (9.4.1.3)
Type "help" for help.

edb=# \l
                                           List of databases
   Name    |    Owner     | Encoding |   Collate   |    Ctype    | ICU |       Access privileges
-----------+--------------+----------+-------------+-------------+-----+-------------------------------
 edb       | enterprisedb | UTF8     | en_US.UTF-8 | en_US.UTF-8 |     |
 postgres  | enterprisedb | UTF8     | en_US.UTF-8 | en_US.UTF-8 |     |
 template0 | enterprisedb | UTF8     | en_US.UTF-8 | en_US.UTF-8 |     | =c/enterprisedb              +
           |              |          |             |             |     | enterprisedb=CTc/enterprisedb
 template1 | enterprisedb | UTF8     | en_US.UTF-8 | en_US.UTF-8 |     | =c/enterprisedb              +
           |              |          |             |             |     | enterprisedb=CTc/enterprisedb
(4 rows)
mission completed. the next post will setup a backup and recovery server for backing up and restoring the ppas database cluster.
if you do a solaris 10u11 core/minimal installation and after that add all packages listed in the documentation the oracle database 12.1.0.2 software installation will fail with:
WARNING: Verification of target environment returned with errors.
WARNING: [WARNING] [INS-13001] Environment does not meet minimum requirements.
CAUSE: Minimum requirements were not met for this environment
ACTION: Either check the logs for more information or check the supported configurations for this product..
Refer associated stacktrace #oracle.install.commons.util.exception.DefaultErrorAdvisor:339
INFO: Advice is CONTINUE
WARNING: Advised to ignore target environment verification errors.
INFO: Verifying setup for installer validations
INFO: Overall status of CVU API call:OPERATION_FAILED
SEVERE: [FATAL] [INS-30131] Initial setup required for the execution of installer validations failed.
CAUSE: Failed to access the temporary location.
ACTION: Ensure that the current user has required permissions to access the temporary location.
this is a bit misleading. the real cause of this (at least in my case) are missing packages:
SUNWpool
SUNWpoolr
once these are installed the installation will succeed.
on planet postgres there is a link to a page which lists all postgres release notes since version 6.0. nice work:
original post here.
often there is the requierement to generate some test data. here are some examples for postgres.
generate_series
the generate_series function is one convenient way for generating data, e.g:
generate increasing integer values:
edb=# select generate_series(1,10);
 generate_series
-----------------
               1
               2
               3
               4
               5
               6
               7
               8
               9
              10
(10 rows)
or:
edb=# select generate_series(-10,-1);
 generate_series
-----------------
             -10
              -9
              -8
              -7
              -6
              -5
              -4
              -3
              -2
              -1
generate increasing integer values with steps:
edb=# select generate_series(0,50,5);
 generate_series
-----------------
               0
               5
              10
              15
              20
              25
              30
              35
              40
              45
              50
(11 rows)
generate decreasing integer values:
edb=# select generate_series(10,0,-1);
 generate_series
-----------------
              10
               9
               8
               7
               6
               5
               4
               3
               2
               1
               0
or:
edb=# select generate_series(10,0,-5);
 generate_series
-----------------
              10
               5
               0
generating date values:
edb=# select * from generate_series( '2015-01-01 00:00'::timestamp
                                   , '2015-01-01 08:00'::timestamp
                                   , '1 hour');
  generate_series
--------------------
 01-JAN-15 00:00:00
 01-JAN-15 01:00:00
 01-JAN-15 02:00:00
 01-JAN-15 03:00:00
 01-JAN-15 04:00:00
 01-JAN-15 05:00:00
 01-JAN-15 06:00:00
 01-JAN-15 07:00:00
 01-JAN-15 08:00:00
(9 rows)
generate_series and random()
combining generate_series and random() is another way:
edb=# select generate_series(10,0,-1) order by random();
 generate_series
-----------------
               0
               9
               3
              10
               6
               5
               2
               8
               7
               1
               4
(11 rows)
or:
select * from generate_series( '2015-01-01 00:00'::timestamp
                                  , '2015-01-01 08:00'::timestamp
                                  , '1 hour') order by random();
  generate_series
--------------------
 01-JAN-15 04:00:00
 01-JAN-15 08:00:00
 01-JAN-15 05:00:00
 01-JAN-15 02:00:00
 01-JAN-15 07:00:00
 01-JAN-15 03:00:00
 01-JAN-15 06:00:00
 01-JAN-15 01:00:00
 01-JAN-15 00:00:00
(9 rows)
generate_series and random() and md5()
adding md5() to the picture:
edb=# select generate_series(1,5) as a, md5(random()::text);
 a |               md5
---+----------------------------------
 1 | 5eb731819cf0dbed770ae8d5f11a27ef
 2 | 995360f0745610e9bc9d73abd954196c
 3 | 1461efd0dc899a8eae612439585935b0
 4 | e4bd67cd9f9bb0034a21dffabfe97509
 5 | 8b7c099d4064be2134ebc6ad11b3ce47
generate_series and random() and md5() and common table expressions
adding common table expressions to the picture:
with testdata1 as
( select generate_series(1,5) as a , md5(random()::text) as b ),
     testdata2 as
( select generate_series(10,0,-2) as c order by random() ),
     testdata3 as
( select * from generate_series( '2015-01-01 00:00'::timestamp
                               , '2015-01-01 08:00'::timestamp
                               , '1 hour') as d )
select case when testdata1.a = 4 then 1 else 0 end  a
     , testdata1.b
     , testdata2.c
     , testdata3.d
  from testdata1
     , testdata2
     , testdata3
 order by random()
 limit 10;

 a |                b                 | c  |         d
---+----------------------------------+----+--------------------
 0 | 542d402aa1d5bc3945b692cdf8bde4bc | 10 | 01-JAN-15 05:00:00
 0 | 58c1b1e0ddc072e9e83e4ca31064a4ef |  4 | 01-JAN-15 06:00:00
 0 | 8d917cf5c06539574fcc79089ff0b66d |  4 | 01-JAN-15 07:00:00
 0 | 8d917cf5c06539574fcc79089ff0b66d |  2 | 01-JAN-15 08:00:00
 0 | 58c1b1e0ddc072e9e83e4ca31064a4ef |  6 | 01-JAN-15 07:00:00
 0 | 58c1b1e0ddc072e9e83e4ca31064a4ef |  0 | 01-JAN-15 01:00:00
 0 | 542d402aa1d5bc3945b692cdf8bde4bc |  2 | 01-JAN-15 08:00:00
 0 | 58c1b1e0ddc072e9e83e4ca31064a4ef |  8 | 01-JAN-15 07:00:00
 0 | f1d9650423b432f75a50ae38591b1508 |  2 | 01-JAN-15 01:00:00
 1 | 687b977261e44825b266f461e7547b08 |  6 | 01-JAN-15 01:00:00
this continues the previous post on the oracle compatibility layer available in ppas. while this previous post introduced some parameters which control the behaviour for dates, strings, object names and transaction isolation this post focusses on some features/helpers that are available in oracle but are not (by default) in plain postgresql. ppas adds these whith the oracle compatibility layer.
dual
as in oracle there is a dual table in ppas:
edb=# select 1+1 from dual;
 ?column?
----------
        2
(1 row)

edb=# \d dual;
             Table "sys.dual"
 Column |         Type         | Modifiers
--------+----------------------+-----------
 dummy  | character varying(1) |
synonyms
there are no synonyms available in community postgres. there are in ppas:
edb=# create table t1 ( a int );
CREATE TABLE
edb=# insert into t1 values (1);
INSERT 0 1
edb=# create synonym s1 for t1;
CREATE SYNONYM
edb=# create public synonym ps1 for t1;
CREATE SYNONYM
edb=# select count(*) from s1;
 count
-------
     1
(1 row)

edb=# select count(*) from ps1;
 count
-------
     1
(1 row)
for describing synonyms “describe” must be used, the “\d” switch will not work:
edb=# desc ps1
                                List of synonyms
 Schema | Synonym | Referenced Schema | Referenced Object | Link |    Owner
--------+---------+-------------------+-------------------+------+--------------
 public | ps1     | enterprisedb      | t1                |      | enterprisedb
(1 row)

   Table "enterprisedb.t1"
 Column |  Type   | Modifiers
--------+---------+-----------
 a      | integer |

edb=# \d ps1
Did not find any relation named "ps1".
more details here.
rownum
the pseudo column rownum is available in ppas:
edb=# create table t1 ( a int );
CREATE TABLE
edb=# insert into t1 values ( generate_series ( 1, 50 ) );
INSERT 0 50
edb=# select a, rownum from t1 where rownum < 5;
 a | rownum
---+--------
 1 |      1
 2 |      2
 3 |      3
 4 |      4
(4 rows)
more details here.
packages
community postgresql does not know the concept of packages. ppas implements this:
edb=# create package p1
edb-# as
edb$#   procedure pc1;
edb$# end p1;
CREATE PACKAGE
edb=# create package body p1
edb-# as
edb$#   procedure pc1
edb$#   as
edb$#   begin
edb$#     dbms_output.put_line('a');
edb$#   end pc1;
edb$# begin
edb$#   null;
edb$# end p1;
CREATE PACKAGE BODY

edb=# exec p1.pc1;
a

EDB-SPL Procedure successfully completed
more details here.
build-in packages
ppas comes with a set of build-in packages:
edb=# select distinct name from dba_source where type = 'PACKAGE' order by 1;
      name
----------------
 DBMS_ALERT
 DBMS_CRYPTO
 DBMS_JOB
 DBMS_LOB
 DBMS_LOCK
 DBMS_MVIEW
 DBMS_OUTPUT
 DBMS_PIPE
 DBMS_PROFILER
 DBMS_RANDOM
 DBMS_RLS
 DBMS_SCHEDULER
 DBMS_SQL
 DBMS_UTILITY
 UTL_ENCODE
 UTL_FILE
 UTL_HTTP
 UTL_MAIL
 UTL_SMTP
 UTL_TCP
 UTL_URL
more details here.
edbplus
if someone prefers to work in a splplus like environment there is edbplus:
pwd
/opt/PostgresPlus/9.4AS
-bash-4.2$ edbplus/edbplus.sh enterprisedb/admin123
Connected to EnterpriseDB 9.4.1.3 (localhost:5444/edb) AS enterprisedb

EDB*Plus: Release 9.4 (Build 33.0.0)
Copyright (c) 2008-2015, EnterpriseDB Corporation.  All rights reserved.

SQL> help index

Type 'HELP [topic]' for command line help.

@              ACCEPT         APPEND         CHANGE
CLEAR          COLUMN         CONNECT        DEFINE
DEL            DESCRIBE       DISCONNECT     EDBPLUS
EDIT           EXIT           GET            HELP
HOST           INDEX          INPUT          LIST
PASSWORD       PAUSE          PRINT          PROMPT
QUIT           REMARK         SAVE           SET
SHOW           SPOOL          START          UNDEFINE
VARIABLE
head over to the documentation to check what is already supported.
Dynamic Runtime Instrumentation Tools Architecture (DRITA)
drita is a kind of perfstat which can be used to analyse performance issues. the usage is straight forward:
as a first step timed_statistics need to be enabled:
edb=# show timed_statistics;
 timed_statistics
------------------
 off
(1 row)
edb=# alter system set timed_statistics=true;
ALTER SYSTEM
edb=# select pg_reload_conf();
 pg_reload_conf
----------------
 t
(1 row)

edb=# show timed_statistics;
 timed_statistics
------------------
 on
(1 row)
after that lets create a snapshot:
edb=# SELECT * FROM edbsnap();
       edbsnap
----------------------
 Statement processed.
(1 row)
… and generate some load on the system:
edb=# create table t1 ( a int, b int );
CREATE TABLE
edb=# create table t2 ( a int, b int );
CREATE TABLE
edb=# insert into t1 values ( generate_series ( 1,10000)
                            , generate_series ( 1,10000) );
INSERT 0 10000
edb=# insert into t2 values ( generate_series ( 1,10000)
                            , generate_series ( 1,10000) );
INSERT 0 10000
edb=# select count(*) from t1, t2;
   count
-----------
 100000000
(1 row)
create another snapshot:
edb=# SELECT * FROM edbsnap();
       edbsnap
----------------------
 Statement processed.
(1 row)
as we need the snapshot ids to generate a report lets check what we have available:
edb=# select * from get_snaps();
          get_snaps
-----------------------------
 1 24-FEB-15 16:21:55.420802
 2 24-FEB-15 16:25:16.429357
(2 rows)
now we can generate a report, e.g. the report for system wait information:
edb=# select * from sys_rpt(1,2,10);
                                   sys_rpt
-----------------------------------------------------------------------------
 WAIT NAME                                COUNT      WAIT TIME       % WAIT
 ---------------------------------------------------------------------------
 autovacuum lock acquire                  18         0.040010        73.84
 query plan                               2          0.011015        20.33
 db file read                             6          0.003124        5.77
 xid gen lock acquire                     3          0.000021        0.04
 sinval lock acquire                      7          0.000006        0.01
 buffer free list lock acquire            9          0.000005        0.01
 freespace lock acquire                   0          0.000001        0.00
 wal buffer mapping lock acquire          0          0.000000        0.00
 multi xact gen lock acquire              3          0.000000        0.00
 wal flush                                0          0.000000        0.00
(12 rows)
there are many other reports which can be generated, inluding:
more details here.
oracle like catalog views
various oracle like catalog views (all_*, dba_*, user_*) are available in ppas:
edb=# select schemaname,viewname
        from pg_views
       where viewname like 'dba%' order by 1,2 limit 5;
 schemaname |     viewname
------------+------------------
 sys        | dba_all_tables
 sys        | dba_cons_columns
 sys        | dba_constraints
 sys        | dba_db_links
 sys        | dba_ind_columns
(5 rows)
more details here.
summary
enterprise db did a great job making life easier for oracle dbas wanting to learn postgresql. in addition the oracle compatibility layer lowers the burdens of migrating applications from oracle to postgres significantly. you almost can start immediately working on a postgresql database by using your existing oracle skills.
the above is only a sub-set of what the oracle compatibility layer provides. for a complete overview check the official documentation.
edbs ppas comes with an oracle compatibility layer. in this and some future posts I’ll take a look at what this layer is about and what you can do with it.
there are four parameters which control the behaviour of the oracle compatibility layer:
lets check the catalog for these parameters and see if we can change them on the fly or if we need to restart the database server:
select name,setting,context
      from pg_settings
     where name in ('edb_redwood_date'
                   ,'edb_redwood_raw_names'
                   ,'edb_redwood_strings'
                   ,'edb_stmt_level_tx');

         name          | setting | context
-----------------------+---------+---------
 edb_redwood_date      | on      | user
 edb_redwood_raw_names | off     | user
 edb_redwood_strings   | on      | user
 edb_stmt_level_tx     | off     | user
fine, all have the context “user” which means we can change them without restarting the server (btw: the above settings are the default if ppas is installed in oracle compatibility mode).
what is edb_redwood_date about?
in postgres, if you specify a column as date there is no time information. setting this parameter to “on” tells the server to use a timestamp instead of pure date data type whenever date is specified for a column. in oracle a column of type date includes the time component, too.
lets switch it to off for now:
edb=# alter system set edb_redwood_date=off;
ALTER SYSTEM
edb=# select pg_reload_conf();
 pg_reload_conf
----------------
 t
(1 row)

edb=# select name,setting,context from pg_settings where name = 'edb_redwood_date';
       name       | setting | context
------------------+---------+---------
 edb_redwood_date | off     | user
(1 row)
and now lets create a simple table with a date column and insert one row:
edb=# create table t1 ( a date );
CREATE TABLE
edb=# \d t1
  Table "enterprisedb.t1"
 Column | Type | Modifiers
--------+------+-----------
 a      | date |

edb=# insert into t1 values (date '2014-01-01');
INSERT 0 1
edb=# select * from t1;
     a
-----------
 01-JAN-14
(1 row)
no time component available. now switch edb_redwood_date to “on”:
edb=# alter system set edb_redwood_date=on;
ALTER SYSTEM
edb=# select pg_reload_conf();
 pg_reload_conf
----------------
 t
(1 row)

edb=# select name,setting,context from pg_settings where name = 'edb_redwood_date';
       name       | setting | context
------------------+---------+---------
 edb_redwood_date | on      | user
(1 row)
… and create another table with type date for the column and do the same insert:
edb=# create table t2 ( a date );
CREATE TABLE
edb=# insert into t2 values ( date '2014-01-01');
INSERT 0 1
edb=# select * from t2;
         a
--------------------
 01-JAN-14 00:00:00
(1 row)
here we go. the time component is now included. but how is this possible? the server created the column with type “timestamp (0)” on the fly:
edb=# \d t2
             Table "enterprisedb.t2"
 Column |            Type             | Modifiers
--------+-----------------------------+-----------
 a      | timestamp without time zone |
what is edb_redwood_raw_names about?
when oracle compatibilty mode is used various oracle catalog views are accessible in ppas, e.g;
edb=# select viewname from pg_views where viewname like 'dba%' limit 5;
    viewname
-----------------
 dba_tables
 dba_users
 dba_constraints
 dba_all_tables
 dba_triggers
(5 rows)
now lets create two tables while edb_redwood_raw_names is set to its default (false/off):
edb=# create table TEST1 (A int);
CREATE TABLE
edb=# create table test2 (a int);
CREATE TABLE
both of these tables are displayed in upper case when looking at the oracle catalog views:
edb=# select table_name from dba_tables where table_name in  ('TEST1','TEST2');
 table_name
------------
 TEST1
 TEST2
(2 rows)
setting edb_redwood_raw_names to true/on changes this behaviour:
edb=# set edb_redwood_raw_names to on;
SET
edb=# show edb_redwood_raw_names;
 edb_redwood_raw_names
-----------------------
 on
(1 row)
edb=# create table TEST3 (A int);
CREATE TABLE
edb=# create table test4 (a int);
CREATE TABLE
edb=# select table_name from dba_tables where table_name in  ('TEST3','TEST4');
 table_name
------------
(0 rows)

edb=# select table_name from dba_tables where table_name in  ('test3','test4');
 table_name
------------
 test3
 test4
(2 rows)
what is edb_redwood_strings about?
edb_redwood_strings controls concatenation of strings. in plain postgres, if a string is concatenated with null the result is null:
edb=# show edb_redwood_strings;
 edb_redwood_strings
---------------------
 on
(1 row)

edb=# set edb_redwood_strings to off;
SET
edb=# show edb_redwood_strings;
 edb_redwood_strings
---------------------
 off
(1 row)

edb=# select 'aaaa'||null;
 ?column?
----------

(1 row)
in oracle the behaviour is the other way around. if a string is concatenated with null the result is the original string:
edb=# set edb_redwood_strings to on;
SET
edb=# show edb_redwood_strings;
 edb_redwood_strings
---------------------
 on
(1 row)

edb=# select 'aaaa'||null;
 ?column?
----------
 aaaa
(1 row)
what is edb_stmt_level_tx about?
this is all about “statement level transaction isolation”, which is the default behaviour in oracle. lets set up a little test case to demonstrate this:
edb=# create table t1 ( a int, b varchar(3) );
CREATE TABLE
edb=# alter table t1 add constraint chk_b check ( b in ('aaa','bbb'));
ALTER TABLE
edb=# create table t2 ( c int, d date );
CREATE TABLE
edb=# alter table t2 add constraint chk_c check ( c in (1,2,3));
ALTER TABLE
the default setting for edb_stmt_level_tx is off:
edb=# show edb_stmt_level_tx;
 edb_stmt_level_tx
-------------------
 off
(1 row)
lets insert some rows in the tables and let the last insert fail (autocommit needs to be off as each statement commits automatically otherwise):
edb=# set autocommit off;
edb=# show autocommit;
autocommit OFF
edb=# insert into t1 (a,b) values (1,'aaa');
INSERT 0 1
edb=# insert into t1 (a,b) values (2,'aaa');
INSERT 0 1
edb=# insert into t2 (c,d) values (1,sysdate);
INSERT 0 1
edb=# insert into t2 (c,d) values (5,sysdate);
ERROR:  new row for relation "t2" violates check constraint "chk_c"
DETAIL:  Failing row contains (5, 24-FEB-15 10:52:29).
if we now do a commit, which rows are there?
edb=# commit;
ROLLBACK
edb=# select * from t1;
 a | b
---+---
(0 rows)

edb=# select * from t2;
 c | d
---+---
(0 rows)
all gone (notice the ROLLBACK after the commit statement). lets witch edb_stmt_level_tx to on and repeat the test:
edb=# set edb_stmt_level_tx to on;
SET
edb=# show edb_stmt_level_tx;
 edb_stmt_level_tx
-------------------
 on
(1 row)

edb=# show autocommit;
autocommit OFF
edb=# insert into t1 (a,b) values (1,'aaa');
INSERT 0 1
edb=# insert into t1 (a,b) values (2,'aaa');
INSERT 0 1
edb=# insert into t2 (c,d) values (1,sysdate);
INSERT 0 1
edb=#  insert into t2 (c,d) values (5,sysdate);
ERROR:  new row for relation "t2" violates check constraint "chk_c"
DETAIL:  Failing row contains (5, 24-FEB-15 10:55:52).
edb=# commit;
COMMIT
edb=# select * from t1;
 a |  b
---+-----
 1 | aaa
 2 | aaa
(2 rows)

edb=# select * from t2;
 c |         d
---+--------------------
 1 | 24-FEB-15 10:55:49
(1 row)
now all the rows are there except for the failing one. this is what edb_stmt_level_tx is about. by default postgresql rolls back everything since the start of the transaction. when switching edb_stmt_level_tx to on only the failing statement is rolled back. in addition, if edb_stmt_level_tx is set to off you can not continue the transaction until either commit or rollback is issued:
edb=# set edb_stmt_level_tx to off;
SET
edb=# insert into t1 (a,b) values (1,'aaa');
INSERT 0 1
edb=# insert into t1 (a,b) values (2,'aaa');
INSERT 0 1
edb=# insert into t2 (c,d) values (1,sysdate);
INSERT 0 1
edb=# insert into t2 (c,d) values (5,sysdate);
ERROR:  new row for relation "t2" violates check constraint "chk_c"
DETAIL:  Failing row contains (5, 24-FEB-15 11:06:52).
edb=# insert into t2 (c,d) values (2,sysdate);
ERROR:  current transaction is aborted, commands ignored until end of transaction block
as json as a datatype for databases is becoming more and more popular here’s a quick example on how to convert a traditional table design to tables containing jsonb in postgres:
-- traditional design
drop schema if exists traditional cascade;
create schema traditional;
create table traditional.customers ( id serial
                                   , name varchar(20)
                                   , active boolean
                                   , country varchar(2)
                                   , phone varchar(20)
                                   , email varchar(50)
                                   );
alter table traditional.customers add constraint customers_pk primary key(id);

create table traditional.orders ( id serial
                                , customer_id int
                                , order_date timestamp with time zone
                                , delivery_date timestamp with time zone
                                );
alter table traditional.orders add constraint orders_pk
    primary key(id);
alter table traditional.orders add constraint orders_ref_customers
    foreign key (customer_id)
    references traditional.customers(id);

DO
$$
BEGIN
   for i in 1..100 loop
     insert into traditional.customers ( name,active,country
                                       , phone,email )
            values ( 'name'||i, case when mod(i,5) = 0 then true else false end
                   , case when mod(i,3) = 0 then 'CH' else 'DE' end
                   , i, i||'@'||i||'.com' );
            for e in 1..10 loop
              insert into traditional.orders ( customer_id, order_date
                                             , delivery_date )
                     values (i, current_timestamp + interval '5 days'
                            , current_timestamp + interval '7 days' );
            end loop;
   end loop;
END
$$;

-- json design
drop schema if exists jsonschema cascade;
create schema jsonschema;
create table jsonschema.customers ( id serial
                                  , customer_data jsonb
                                  );
alter table jsonschema.customers add constraint customers_pk
      primary key(id);

create table jsonschema.orders ( id serial
                               , customer_id int
                               , order_data jsonb
                               );
alter table jsonschema.orders add constraint orders_pk primary key(id);
alter table jsonschema.orders add constraint orders_ref_customers
     foreign key (customer_id)
     references traditional.customers(id);

insert into jsonschema.customers ( customer_data )
        ( select row_to_json(cust)::jsonb
            from ( select name, active, country, phone, email
                     from traditional.customers
                 ) cust
        );

with tt (id,order_date,delivery_date) as (
  select id,order_date, delivery_date
    from traditional.orders
  order by id )
,    dd (id,customer_id) as (
  select id, customer_id
    from traditional.orders
  order by id )
insert into jsonschema.orders ( customer_id, order_data )
   select dd.customer_id
        , row_to_json(tt)::jsonb
     from dd, tt
    where dd.id = tt.id;
comparing the different approaches:
postgres=# select * from traditional.customers limit 2;
 id | name  | active | country | phone |  email
----+-------+--------+---------+-------+---------
  1 | name1 | f      | DE      | 1     | 1@1.com
  2 | name2 | f      | DE      | 2     | 2@2.com
(2 rows)

postgres=# select * from jsonschema.customers limit 2;
 id |                                     customer_data
----+---------------------------------------------------------------------------------------
  1 | {"name": "name1", "email": "1@1.com", "phone": "1", "active": false, "country": "DE"}
  2 | {"name": "name2", "email": "2@2.com", "phone": "2", "active": false, "country": "DE"}
this is merely a documenation post for myself as I always forgot the steps to get this working. as postgres plus advanced server 9.4 was released some days ago we wanted to do another poc for an oracle migration. using edbmtk was clearly the preferred way to do this as it automates most of the tasks. but how did we need to set this up the last time?
as a first step one needs to download the oracle jdbc driver for the java version available on the postgres server.
example:
ojdbc6.jar – for use with java 6
ojdbc7.jar – for use with java 7
put one of these under:
ls -la /etc/alternatives/jre/lib/ext/
total 5264
drwxr-xr-x.  2 root root    4096 Feb 12 12:54 .
drwxr-xr-x. 11 root root    4096 Jan 26 18:26 ..
-rw-r--r--.  1 root root   10075 Jan  9 02:39 dnsns.jar
-rw-r--r--.  1 root root  452904 Jan  9 02:48 gnome-java-bridge.jar
-rw-r--r--.  1 root root  558461 Jan  9 02:40 localedata.jar
-rw-r--r--.  1 root root     427 Jan  9 02:45 meta-index
-rw-r--r--.  1 root root 3698857 Feb 12 12:54 ojdbc7.jar
-rw-r--r--.  1 root root   69699 Jan  9 02:46 pulse-java.jar
-rw-r--r--.  1 root root  225679 Jan  9 02:41 sunjce_provider.jar
-rw-r--r--.  1 root root  259918 Jan  9 02:39 sunpkcs11.jar
-rw-r--r--.  1 root root   78194 Jan  9 02:42 zipfs.jar
the next step is to configure the toolkit.properties file:
cat /opt/PostgresPlus/edbmtk/etc/toolkit.properties
SRC_DB_URL=jdbc:oracle:thin:@[ORACLE_SERVER]:[LISTENER_PORT]:[DATABASE]
SRC_DB_USER=system
SRC_DB_PASSWORD=manager

TARGET_DB_URL=jdbc:edb://localhost:5432/[POSTGRES_DATABASE]
TARGET_DB_USER=postgres
TARGET_DB_PASSWORD=postgres
… and then kickoff the migration:
cd /opt/PostgresPlus/edbmtk/bin
./runMTK.sh -fastCopy -logBadSQL -fetchSize 10000 -loaderCount 6 -dropSchema true -useOraCase ORACLE_SCHEMA1,ORACLE_SCHEMA2,...
pretty easy. wait for edbmtk to finish and start fixing the objects that are invalid :)
btw: for migrations to pure community postgres take a look at ora2pg
 11.2.0.99