
To summarize all the posts which will get you to your test infrastructure, here is the overview:
Archives For February 29, 2012
I could have applied the PSU earlier ( before creating the database ), but in real life this is the more likely scenario. As the patch sources are already in place:
su - oracle
cd /opt/oracle/stage
ls -la
6880880_112000_Linux-x86-64.zip
p13348650_112030_Linux-x86-64.zip
opatch_response.rsp
start with updating opatch:
unzip p6880880_112000_Linux-x86-64.zip -d $ORACLE_HOME/
It is safe to answer “All” if the unzip utility ask to replace some files.
Extract and check the readme:
unzip p13348650_112030_LINUX.zip
The structure of the oracle patches is always the same. You will get subdirectories named with the patch number and the readme:
ls -la
drwxr-xr-x 4 oracle oinstall 4096 Jan 14 17:08 13343438
drwxr-xr-x 5 oracle oinstall 4096 Jan 14 17:08 13348650
-rw-r--r-- 1 oracle oinstall 422 Jan 14 17:08 bundle.xml
-rwxrwx--- 1 grid oinstall 621 Mar 23 11:31 opatch_response.rsp
-rwxrwx--- 1 grid oinstall 32510817 Mar 23 10:54 p6880880_112000_Linux-x86-64.zip
-rw-rw-r-- 1 oracle oinstall 107674 Jan 16 14:49 README.html
-rw-r--r-- 1 oracle oinstall 21 Jan 14 17:08 README.txt
Because this patch contains both, the database and the grid patches, change to the database patch directory ( which is 13343438 ) and apply the patchset:
cd /opt/oracle/stage/13343438
srvctl stop listener -l listener_DB112
srvctl stop database -d DB112
export PATH=$ORACLE_HOME/OPatch:$PATH
opatch lsinventory -detail -oh $ORACLE_HOME
opatch prereq CheckConflictAgainstOHWithDetail -phBaseDir /opt/oracle/stage/13343438 -oh $ORACLE_HOME
$ORACLE_HOME/OPatch/ocm/bin/emocmrsp -output /opt/oracle/stage/opatch_response.rsp -no_banner
opatch apply -ocmrf /opt/oracle/stage/opatch_response.rsp
The output should be very similar to this:
Oracle Home : /opt/oracle/product/base/11.2.0.3
Central Inventory : /opt/oracle/oraInventory
from : /opt/oracle/product/base/11.2.0.3/oraInst.loc
OPatch version : 11.2.0.3.0
OUI version : 11.2.0.3.0
Log file location : /opt/oracle/product/base/11.2.0.3/cfgtoollogs/opatch/13343438_Mar_28_2012_15_35_47/apply2012-03-28_15-35-47PM_1.log
Applying interim patch '13343438' to OH '/opt/oracle/product/base/11.2.0.3'
Verifying environment and performing prerequisite checks...
All checks passed.
Please shutdown Oracle instances running out of this ORACLE_HOME on the local system.
(Oracle Home = '/opt/oracle/product/base/11.2.0.3')
Is the local system ready for patching? [y|n]
y
User Responded with: Y
Backing up files...
Patching component oracle.rdbms.rsf, 11.2.0.3.0...
Patching component oracle.rdbms, 11.2.0.3.0...
Patching component oracle.rdbms.dbscripts, 11.2.0.3.0...
Verifying the update...
Patch 13343438 successfully applied
Log file location: /opt/oracle/product/base/11.2.0.3/cfgtoollogs/opatch/13343438_Mar_28_2012_15_35_47/apply2012-03-28_15-35-47PM_1.log
OPatch succeeded.
Patch ( almost ) applied.
Perhaps you noticed that opatch creates a new directory under you ORACLE_HOME which is called .patch_storage:
ls -la /opt/oracle/product/base/11.2.0.3/.patch_storage/
total 28
drwxr-xr-x 4 oracle oinstall 4096 Mar 28 15:38 .
drwxrwx--- 75 oracle oinstall 4096 Mar 28 15:36 ..
drwxr-xr-x 4 oracle oinstall 4096 Mar 28 15:38 13343438_Jan_3_2012_02_50_27
-rw-r--r-- 1 oracle oinstall 336 Mar 28 15:36 interim_inventory.txt
-rw-r--r-- 1 oracle oinstall 92 Mar 28 15:36 LatestOPatchSession.properties
-rw-r--r-- 1 oracle oinstall 0 Mar 28 15:38 patch_free
-rw-r--r-- 1 oracle oinstall 51 Mar 28 15:36 record_inventory.txt
drwxr-xr-x 2 oracle oinstall 4096 Mar 28 15:38 verify
Under no circumstances delete this files. You will not be able apply any futures patches if you do this. If you really experience space issues, you can do a cleanup of the files which are not needed:
opatch util cleanup
One step is still missing. It it very likely that oracle modified some SQL files with this patch, so one needs to apply this, too:
srvctl start listener -l listener_DB112
srvctl start database -d DB112
sqlplus / as sysdba
@?/psu/11.2.0.3.1/catpsu.sql
select * from registry$history;
Work done.
Now there is a working Grid Infrastructure and database each patched to the ( currently ) latest release. If you did not export your Virtual Machine and did not create any snapshots I recommend to do an export now ( you need to shutdown your Virtual Machine for this ):
vboxmanage export "oracleplayground" --output oracleplayground.ovf
If you destroy the database or any parts of the grid infrastructure you are always able to bring it back in a few minutes.
Where to go from now ? This depends on you. If you are new to oracle there is a lot of literature out there, but the most important ( and at no cost ): Oracle Database Concepts . This should be your starting point.

Before I start with the database creation, there remain some steps to be performed. Because I will place the files inside the ASM instance there is no need to create separate filesystems for datafiles, redologs, control-files. But still I want a custom location for the audit logs, pfile and diagnostic destination. Let’s prepare this:
su -
mkdir /oradata/DB112
chown oracle:dba /oradata/DB112
su - oracle
mkdir -p /oradata/DB112/admin/pfile
mkdir /oradata/DB112/admin/adump
The easiest, and probably the best way for most environments is to go with the defaults. Let’s start by creating a minimal pfile…
su - oracle
echo "*.audit_file_dest='/oradata/DB112/admin/adump'
*.control_files='+DB112_DATA_DG','+DB112_ARCH_DG'
*.db_block_size=8192
*.db_name='DB112'
*.instance_name='DB112'
*.sga_max_size=256M
*.sga_target=256M
*.undo_tablespace='undotbs1'
*.diagnostic_dest=/oradata/DB112/admin" > /oradata/DB112/admin/pfile/initDB112.ora
… check that we can initially start the instance…
sqlplus / as sysdba
startup force nomount pfile=/oradata/DB112/admin/pfile/initDB112.ora
… create the server parameter file:
create spfile='/oradata/DB112/admin/pfile/spfileDB112.ora' from pfile='/oradata/DB112/admin/pfile/initDB112.ora';
… create a link to the server parameter file ( for oracle to find the file )
!ln -s /oradata/DB112/admin/pfile/spfileDB112.ora $ORACLE_HOME/dbs/spfileDB112.ora
… restart without specifying a pfile to see if the spfile gets used:
startup force nomount
show parameter pfile;
… and create the database
create database DB112
logfile
group 1 ('+DB112_DATA_DG','+DB112_ARCH_DG') size 16M reuse,
group 2 ('+DB112_DATA_DG','+DB112_ARCH_DG') size 16M reuse,
group 3 ('+DB112_DATA_DG','+DB112_ARCH_DG') size 16M reuse
character set utf8
national character set AL16UTF16
datafile '+DB112_DATA_DG' size 512M reuse autoextend on next 8M maxsize 1024M extent management local
default temporary tablespace TEMP tempfile '+DB112_DATA_DG' size 64M reuse autoextend on next 8M maxsize 1024M
sysaux datafile '+DB112_DATA_DG' size 512M reuse autoextend on next 8M maxsize 1024M
default tablespace USERS datafile '+DB112_DATA_DG' size 4m reuse autoextend on next 8m maxsize 16M
undo tablespace UNDOTBS1 datafile '+DB112_DATA_DG' size 64M reuse autoextend on next 8M maxsize 1024M;
… create the dictionary:
@?/rdbms/admin/catalog.sql
… and the plsql stuff:
@?/rdbms/admin/catproc.sql
… create the help tables for sqlplus and populate it:
@?/sqlplus/admin/help/hlpbld.sql helpus.sql
shutdown immediate;
exit;
Done. Database created. What else ? Right, register the database with the Cluster Stack and create a listener:
srvctl add database -d DB112 -o $ORACLE_HOME -p $ORACLE_HOME/dbs/spfileDB112.ora
srvctl add listener -l listener_DB112 -p 1521 -o $ORACLE_HOME
touch chmod 770 /opt/oracle/product/base/11.2.0.3/network/admin/listener.ora
chmod 770 /opt/oracle/product/base/11.2.0.3/
chmod 770 /opt/oracle/product/base/11.2.0.3/dbs
chmod 770 /opt/oracle/product/base/11.2.0.3/network/
chmod 770 /opt/oracle/product/base/11.2.0.3/network/admin
chmod 770 /opt/oracle/product/base/11.2.0.3/network/admin/listener.ora
srvctl start listener -l listener_DB112
srvctl start database -d DB112
Please notice: The chmods are dirty tricks to avoid CRS-5010 issues. The reason for the CRS-5010 messages is that the cluster stack runs under a different user ( grid in this case ) and is not able to update the files. Maybe there is a fix in the future.
Let’s check the resources and do a reboot to check if all comes up again:
su - grid
crsctl status resource -t
su -
reboot
su - grid
crsctl status resource -t
You should see that the resources are up and running, something like:
+ASM@oracleplayground.fun grid:/home/grid $ crsctl status resource -t
--------------------------------------------------------------------------------
NAME TARGET STATE SERVER STATE_DETAILS
--------------------------------------------------------------------------------
Local Resources
--------------------------------------------------------------------------------
ora.DB112_ARCH_DG.dg
ONLINE ONLINE oracleplayground
ora.DB112_DATA_DG.dg
ONLINE ONLINE oracleplayground
ora.LISTENER_ASM.lsnr
ONLINE ONLINE oracleplayground
ora.LISTENER_DB112.lsnr
ONLINE ONLINE oracleplayground
ora.asm
ONLINE ONLINE oracleplayground Started
ora.ons
OFFLINE OFFLINE oracleplayground
--------------------------------------------------------------------------------
Cluster Resources
--------------------------------------------------------------------------------
ora.cssd
1 ONLINE ONLINE oracleplayground
ora.db112.db
1 ONLINE ONLINE oracleplayground Open
ora.diskmon
1 OFFLINE OFFLINE
ora.evmd
1 ONLINE ONLINE oracleplayground
For your convenience, here the complete database creation script:
echo "*.audit_file_dest='/oradata/DB112/admin/adump'
*.control_files='+DB112_DATA_DG','+DB112_ARCH_DG'
*.db_block_size=8192
*.db_name='DB112'
*.instance_name='DB112'
*.sga_max_size=256M
*.sga_target=256M
*.undo_tablespace='undotbs1'
*.diagnostic_dest=/oradata/DB112/admin" > /oradata/DB112/admin/pfile/initDB112.ora
sqlplus / as sysdba
startup force nomount pfile=/oradata/DB112/admin/pfile/initDB112.ora
create spfile='/oradata/DB112/admin/pfile/spfileDB112.ora' from pfile='/oradata/DB112/admin/pfile/initDB112.ora';
!ln -s /oradata/DB112/admin/pfile/spfileDB112.ora $ORACLE_HOME/dbs/spfileDB112.ora
startup force nomount
show parameter pfile;
create database DB112
logfile
group 1 ('+DB112_DATA_DG','+DB112_ARCH_DG') size 16M reuse,
group 2 ('+DB112_DATA_DG','+DB112_ARCH_DG') size 16M reuse,
group 3 ('+DB112_DATA_DG','+DB112_ARCH_DG') size 16M reuse
character set utf8
national character set AL16UTF16
datafile '+DB112_DATA_DG' size 512M reuse autoextend on next 8M maxsize 1024M extent management local
default temporary tablespace TEMP tempfile '+DB112_DATA_DG' size 64M reuse autoextend on next 8M maxsize 1024M
sysaux datafile '+DB112_DATA_DG' size 512M reuse autoextend on next 8M maxsize 1024M
default tablespace USERS datafile '+DB112_DATA_DG' size 4m reuse autoextend on next 8m maxsize 16M
undo tablespace UNDOTBS1 datafile '+DB112_DATA_DG' size 64M reuse autoextend on next 8M maxsize 1024M;
@?/rdbms/admin/catalog.sql
@?/rdbms/admin/catproc.sql
@?/sqlplus/admin/help/hlpbld.sql helpus.sql
shutdown immediate;
exit;
srvctl add database -d DB112 -o $ORACLE_HOME -p $ORACLE_HOME/dbs/spfileDB112.ora
srvctl add listener -l listener_DB112 -p 1521 -o $ORACLE_HOME
touch chmod 770 /opt/oracle/product/base/11.2.0.3/network/admin/listener.ora
chmod 770 /opt/oracle/product/base/11.2.0.3/
chmod 770 /opt/oracle/product/base/11.2.0.3/dbs
chmod 770 /opt/oracle/product/base/11.2.0.3/network/
chmod 770 /opt/oracle/product/base/11.2.0.3/network/admin
chmod 770 /opt/oracle/product/base/11.2.0.3/network/admin/listener.ora
srvctl start listener -l listener_DB112
srvctl start database -d DB112
…a customer needed a quick way for enabling index monitoring for a whole schema:
don’t know what index monitoring is? check the documentation
example calls:
@index_monitoring_bulk USER ON Y
@index_monitoring_bulk USER OFF Y
Script:
/**
enable index monitoring for a given user
   parameters: user, on/off, debug
       e.g. @index_monitoring_bulk USER ON Y
**/
SET SERVEROUT ON
SET LINES 164
SET VERIFY OFF
SET FEEDBACK OFF
CLEAR COLUMNS
VARIABLE for_user CHAR(30)
VARIABLE on_off CHAR(3)
VARIABLE debug_on CHAR(1)
BEGIN
  :for_user := '&1';
  :on_off := '&2';
  :debug_on := '&3';
END;
/
DECLARE
  lcb_debug CONSTANT BOOLEAN := :debug_on = 'Y';
  lcv_user CONSTANT all_users.username%TYPE := UPPER ( REPLACE ( :for_user, ' ','' ) );
  lcv_on_off CONSTANT VARCHAR2(3) := NVL ( REPLACE ( :on_off, ' ', '' ), 'OFF' );
  TYPE tab_index_names IS TABLE OF all_indexes.index_name%TYPE INDEX BY PLS_INTEGER;
  ltab_index_names tab_index_names;
  lv_statement VARCHAR2(2000);
  lv_monitoring_clause VARCHAR2(12);
  le_iot EXCEPTION;
  le_resouce_busy EXCEPTION;
  PRAGMA EXCEPTION_INIT(le_iot, -25176);
  PRAGMA EXCEPTION_INIT(le_resouce_busy, -00054);
  PROCEDURE debug ( pv_text IN VARCHAR2 )
  IS
  BEGIN
    IF ( lcb_debug )
    THEN
      dbms_output.put_line ( pv_text );
    END IF;
  END debug;
  FUNCTION user_exists ( pv_user IN all_users.username%TYPE )
                       RETURN BOOLEAN
  IS
    CURSOR cur_check_user
    IS SELECT 'does_exist'
         FROM all_users
        WHERE username = pv_user
    ;
    lv_cursor_result VARCHAR2(10);
  BEGIN
    debug ( ' Checking database for user: '|| lcv_user );
    OPEN cur_check_user;
      FETCH cur_check_user INTO lv_cursor_result;
    CLOSE cur_check_user;
    RETURN lv_cursor_result IS NOT NULL;
  END user_exists;
  PROCEDURE get_indexes_for_user ( pv_user IN all_users.username%TYPE )
  IS
    CURSOR cur_get_indexes_for_user
    IS SELECT index_name
         FROM all_indexes
        WHERE owner = pv_user
    ;
  BEGIN
    OPEN cur_get_indexes_for_user;
      FETCH cur_get_indexes_for_user BULK COLLECT INTO ltab_index_names;
    CLOSE cur_get_indexes_for_user;
  END get_indexes_for_user;
BEGIN
  IF user_exists ( pv_user => lcv_user )
  THEN
    IF lcv_on_off IN ('ON','OFF')
    THEN
      debug ( ' User: '||lcv_user||' does exist ');
      debug ( ' ON/OFF flag is: '||lcv_on_off );
      debug ( ' Loading indexes ' );
      get_indexes_for_user ( pv_user => lcv_user );
      IF ( lcv_on_off = 'ON' )
      THEN
        lv_monitoring_clause := 'MONITORING';
      ELSE
        lv_monitoring_clause := 'NOMONITORING';
      END IF;
      IF ltab_index_names IS NOT NULL
         AND
         ltab_index_names.COUNT > 0
      THEN
         FOR i IN ltab_index_names.FIRST..ltab_index_names.LAST
         LOOP
           debug ( ' Processing index: '||lcv_user||'.'||ltab_index_names(i) );
           lv_statement := 'ALTER INDEX "'||lcv_user||'"."'||ltab_index_names(i)||'" '||lv_monitoring_clause||' USAGE';
           debug ( ' Statement is: '||lv_statement );
           BEGIN
             EXECUTE IMMEDIATE lv_statement;
           EXCEPTION WHEN le_iot THEN debug ( ' --- Index monitoring not possible on IOTs, skipping' );
                     WHEN le_resouce_busy THEN debug ( ' --- Resource busy, propably SYS_ indexes ' );
           END;
         END LOOP;
      END IF;
    ELSE
      dbms_output.put_line ( ' ON/OFF flag must be ON or OFF ' );
    END IF;
  ELSE
    dbms_output.put_line ( ' User '||lcv_user|| ' does not exist ! ');
  END IF;
END;
/
After your usual workload check the results in v$object_usage:
SQL> desc v$object_usage;
 Name					   Null?    Type
 ----------------------------------------- -------- ----------------------------
 INDEX_NAME				   NOT NULL VARCHAR2(30)
 TABLE_NAME				   NOT NULL VARCHAR2(30)
 MONITORING					    VARCHAR2(3)
 USED						    VARCHAR2(3)
 START_MONITORING				    VARCHAR2(19)
 END_MONITORING 				    VARCHAR2(19)
SQL>
To summarize the situation until now: The operating system is installed and configured. On top of it I installed the grid infrastructure software, configured it for single node usage, patched it to the latest release and created the ASM instance including to disk-groups. Several reboot tests proved that the whole stack survives a server reboot and we do not need to create any custom scripts to manage the shutdown and startup of the resources managed by the cluster stack.
Now we are doing the database software installation ( in much se same way we installed the grid infrastructure software ). You will notice once again: If all the prerequisites have been met, the software installation is no magic at all.
If you did not transer the source files ( p10404530_112030_Linux-x86-64_1of7.zip and p10404530_112030_Linux-x86-64_2of7.zip) to your Virtual Machine, now is the time to do so ( see here for a description on how to do it ).
As the database software will be installed under the “oracle” user, establish a ssh connection to your Virtual Machine and do the installation ( I will do a software only installation here, nothing will be configured for the moment ):
su - oracle
cd /opt/oracle/stage
unzip p10404530_112030_Linux-x86-64_1of7.zip
unzip p10404530_112030_Linux-x86-64_2of7.zip
cd database
./runInstaller \
oracle.install.option=INSTALL_DB_SWONLY \
ORACLE_BASE=/opt/oracle/product/base \
ORACLE_HOME=/opt/oracle/product/base/11.2.0.3 \
ORACLE_HOME_NAME=H112030 \
UNIX_GROUP_NAME=oinstall \
oracle.install.db.DBA_GROUP=dba \
oracle.install.db.OPER_GROUP=oper \
FROM_LOCATION=../stage/products.xml \
INVENTORY_LOCATION=/opt/oracle/oraInventory \
SELECTED_LANGUAGES=en \
oracle.install.db.InstallEdition=EE \
DECLINE_SECURITY_UPDATES=true \
-ignoreSysPrereqs \
-ignorePrereq \
-waitforcompletion \
-silent
su -
/opt/oracle/product/base/11.2.0.3/root.sh
Again, that’s all what needs to be done.
Let’s set up some environment variables and aliases…
su - oracle
echo "ORACLE_HOME=/opt/oracle/product/base/11.2.0.3
ORACLE_SID=DB112
LD_LIBRARY_PATH=/opt/oracle/product/base/11.2.0.3/lib:$LD_LIBRARY_PATH
PATH=/opt/oracle/product/base/11.2.0.3/bin:$PATH
PS1='\[33[1;34m\]${ORACLE_SID}\[33[1;33m\]@\[33[1;32m\]`uname -n`\[33[0m\] $LOGNAME:$PWD $ '
export ORACLE_HOME ORACLE_SID LD_LIBRARY_PATH PATH PS1
alias sqlp='sqlplus '\''/ as sysdba'\'''
" >> ~/.bash_profile
A final little test, to prove that sqlplus is working:
su - oracle
sqlp
… you should see something like this:
DB112@oracleplayground.fun oracle:/home/oracle $ sqlp
SQL*Plus: Release 11.2.0.3.0 Production on Mon Mar 26 14:42:12 2012
Copyright (c) 1982, 2011, Oracle. All rights reserved.
Connected to an idle instance.
SQL> exit;
Disconnected
DB112@oracleplayground.fun oracle:/home/oracle $
Congratulations, now you are prepared to set up the oracle database instance.
Again, remember to take a snapshot of your Virtual Machine if you want to save your work or if you want to revert to this point. Delete the source files if you do not want to become your Virtual Machine too big before:
su - oracle
cd /opt/oracle/stage/
rm -rf database p10404530_112030_Linux-x86-64_1of7.zip p10404530_112030_Linux-x86-64_2of7.zip
On your workstation create the snapshot:
vboxmanage snapshot oracleplayground take "after database software installation"
OS ready, Grid Infrastructure ready, patched to the latest release. Time to start with the “real” things…
Thanks to the virtualization technology ( Virtual Box ) in this case, it is easy to add storage to you machine. If running, shut down your Virtual Machine and add two disks to it.
From your workstation, execute:
vboxmanage storagectl oracleplayground --name "SCSI Controller" --add scsi --controller LSILogic
vboxmanage createhd --filename ~/VirtualBox\ VMs/oracleplayground/oracleplayground_asm1.vdi --size=10240 --variant Fixed
vboxmanage createhd --filename ~/VirtualBox\ VMs/oracleplayground/oracleplayground_asm2.vdi --size=10240 --variant Fixed
vboxmanage storageattach oracleplayground --storagectl "SCSI Controller" --port 1 --device 0 --type hdd --medium ~/VirtualBox\ VMs/oracleplayground/oracleplayground_asm1.vdi
vboxmanage storageattach oracleplayground --storagectl "SCSI Controller" --port 2 --device 0 --type hdd --medium ~/VirtualBox\ VMs/oracleplayground/oracleplayground_asm2.vdi
What happened: We created a new SCSI Controller for our Virtual Machine, created two 10gb hard disks and attached them to the Controller.
Startup your Virtual Machine and check the devices:
su -
ls -la /dev/sd*
brw-r----- 1 root disk 8, 0 Mar 23 13:02 /dev/sda
brw-r----- 1 root disk 8, 16 Mar 23 13:02 /dev/sdb
These are our newly created disks. What we will need for ASM is one partition for each disk, so lets create the partitions:
su -
fdisk /dev/sda
fdisk /dev/sdb
The commands for creating the partitions are ( in this sequence ): p n p 1 enter enter w quit
If we check the devices again, we now can see the newly created partitions:
ls -la /dev/sd*
brw-r----- 1 root disk 8, 0 Mar 23 13:06 /dev/sda
brw-r----- 1 root disk 8, 1 Mar 23 13:06 /dev/sda1
brw-r----- 1 root disk 8, 16 Mar 23 13:09 /dev/sdb
brw-r----- 1 root disk 8, 17 Mar 23 13:09 /dev/sdb1
To be usable to asm, the disks must belong to the grid user. We could change the permissions now with chmod, but because we want this to be persistent across reboots we create udev rules for it:
su -
echo "KERNEL==\"sd[a-b][1-9]*\", OWNER=\"grid\", GROUP=\"asmadmin\", MODE=\"0660\"" > /etc/udev/rules.d/61-asm.rules
reboot
Once the Virtual Machine rebooted, check the devices again and you will see that the owner,group and permissions changed:
su -
ls -la /dev/sd*
brw-r----- 1 root disk 8, 0 Mar 23 13:17 /dev/sda
brw-rw---- 1 grid asmadmin 8, 1 Mar 23 13:17 /dev/sda1
brw-r----- 1 root disk 8, 16 Mar 23 13:17 /dev/sdb
brw-rw---- 1 grid asmadmin 8, 17 Mar 23 13:17 /dev/sdb1
Now we are prepared for creating our ASM instance. Because we are lazy, lets define two variables for the init.ora and the spfile:
su - grid
INITORA=$ORACLE_HOME/dbs/init+ASM.ora
SPFILE=$ORACLE_HOME/dbs/spfile+ASM.ora
Create a minimal set of parameters:
echo "instance_type='asm'
memory_target=128m
memory_max_target=128m
" > ${INITORA}
… and start the cssd resource ( which is the cluster synchronization service, required by ASM ):
crsctl start resource ora.cssd
You should see the following output:
CRS-2672: Attempting to start 'ora.cssd' on 'oracleplayground'
CRS-2672: Attempting to start 'ora.diskmon' on 'oracleplayground'
CRS-2676: Start of 'ora.diskmon' on 'oracleplayground' succeeded
CRS-2676: Start of 'ora.cssd' on 'oracleplayground' succeeded
Let’s try if we can startup and shutdown our ASM instance:
sqlplus /nolog <<EOF
connect / as sysasm
startup force nomount pfile=${INITORA};
shutdown abort;
exit;
EOF
The output should look like:
SQL*Plus: Release 11.2.0.3.0 Production on Fri Mar 23 13:28:29 2012
Copyright (c) 1982, 2011, Oracle. All rights reserved.
SQL> Connected to an idle instance.
SQL> ASM instance started
Total System Global Area 267227136 bytes
Fixed Size 2227504 bytes
Variable Size 239833808 bytes
ASM Cache 25165824 bytes
SQL> ASM instance shutdown
SQL> Disconnected from Oracle Database 11g Enterprise Edition Release 11.2.0.3.0 - 64bit Production
With the Automatic Storage Management option
Ok, basically we are able to startup our ASM instance. As we want our ASM instance managed by the cluster stack, we will need to create and register some resources.
Start by adding the listener for the ASM instance:
srvctl add listener -l listener_ASM -o $ORACLE_HOME -p 1526
… continue with adding ASM itself:
srvctl add asm -l listener_ASM -p ${INITORA}
… startup listener and ASM:
srvctl start listener -l listener_ASM
srvctl start asm
… and check the resources ( we will use the alias again. you can also type “crsctl status resource -t” ):
crsstat
If you followed the steps, this is what you will see:
--------------------------------------------------------------------------------
NAME TARGET STATE SERVER STATE_DETAILS
--------------------------------------------------------------------------------
Local Resources
--------------------------------------------------------------------------------
ora.LISTENER_ASM.lsnr
ONLINE ONLINE oracleplayground
ora.asm
ONLINE ONLINE oracleplayground Started
ora.ons
OFFLINE OFFLINE oracleplayground
--------------------------------------------------------------------------------
Cluster Resources
--------------------------------------------------------------------------------
ora.cssd
1 ONLINE ONLINE oracleplayground
ora.diskmon
1 OFFLINE OFFLINE
ora.evmd
1 ONLINE ONLINE oracleplayground
Two new resources are showing up, the listener and the ASM instance.
Lets create a spfile for the ASM instance:
srvctl stop asm
sqlplus /nolog <<EOF
connect / as sysasm
create spfile='${SPFILE}' from pfile='${INITORA}';
startup force;
show parameter pfile
shutdown abort;
exit;
EOF
You can ignore the “ORA-15110: no disk-groups mounted” message in the output. We will create disk-groups shortly.
As we registered ASM with a pfile in the cluster stack, we need to modify this:
srvctl modify asm -p ${SPFILE}
srvctl start asm
srvctl config asm
crsctl status resource -t
rm -f ${INITORA}
Fine, ASM is now managed by cluster stack. We do not need to worry about shutting down or starting up the instance when the server reboots anymore. And we even do not need to create startup or shutdown scripts for the ASM instance.
ASM without any disks and disk-group does not make much sense. Lets create some:
sqlplus /nolog <<EOF
connect / as sysasm
alter system set asm_diskstring='/dev/sd*' scope=both;
create diskgroup DB112_DATA_DG external redundancy
disk '/dev/sda1' name DB112_DATA_DG_VOL01
attribute
'au_size' = '4M'
, 'compatible.asm' = '11.2'
, 'compatible.rdbms' = '11.2'
;
create diskgroup DB112_ARCH_DG external redundancy
disk '/dev/sdb1' name DB112_ARCH_DG_VOL01
attribute
'au_size' = '4M'
, 'compatible.asm' = '11.2'
, 'compatible.rdbms' = '11.2'
;
exit;
EOF
Work done. You can check the cluster stack for the status of the resources:
crsstat
Notice the disk-groups showing up:
--------------------------------------------------------------------------------
NAME TARGET STATE SERVER STATE_DETAILS
--------------------------------------------------------------------------------
Local Resources
--------------------------------------------------------------------------------
ora.DB112_ARCH_DG.dg
ONLINE ONLINE oracleplayground
ora.DB112_DATA_DG.dg
ONLINE ONLINE oracleplayground
ora.LISTENER_ASM.lsnr
ONLINE ONLINE oracleplayground
ora.asm
ONLINE ONLINE oracleplayground Started
ora.ons
OFFLINE OFFLINE oracleplayground
--------------------------------------------------------------------------------
Cluster Resources
--------------------------------------------------------------------------------
ora.cssd
1 ONLINE ONLINE oracleplayground
ora.diskmon
1 OFFLINE OFFLINE
ora.evmd
1 ONLINE ONLINE oracleplayground
Although it is optional, let’s create some directories for holding the audit logs and diagnostic files. I personally prefer to have it outside the ORACLE_HOME:
su -
mkdir -p /oradata/+ASM
chown grid:oinstall /oradata/+ASM
su - grid
mkdir /oradata/+ASM/admin
mkdir /oradata/+ASM/admin/adump
sqlpa
alter system set audit_file_dest='/oradata/+ASM/admin/adump' scope=spfile;
alter system set diagnostic_dest='/oradata/+ASM/admin' scope=spfile;
exit;
srvctl stop asm -f
srvctl start asm
sqlpa
show parameter audit_file_dest
show parameter diagnostic_dest
exit
echo "ADR_BASE_LISTENER_ASM=/oradata/+ASM/admin" >> /opt/oracle/product/crs/11.2.0.3/network/admin/listener.ora
srvctl stop listener -l listener_asm
srvctl start listener -l listener_asm
What happened: We told the listener and the asm instance to place the traces and logs at the location we want to.
Finally, let’s create an alias for the sqlplus connections:
echo "alias sqlpa='sqlplus '\''/ as sysasm'\'''" >> ~/.bash_profile
If you re-login as grid user, you can now connect the easy way:
sqlpa
As usual ( on your workstation ), if you like, create a snapshot to save your work:
vboxmanage snapshot oracleplayground take "asm running"
For your convenience, here’s the complete script:
#!/bin/bash
if [ $(id -un) != "grid" ]; then
echo "you must run this as root"
exit 0
fi
INITORA=$ORACLE_HOME/dbs/init+ASM.ora
SPFILE=$ORACLE_HOME/dbs/spfile+ASM.ora
echo "instance_type='asm'
memory_target=128m
memory_max_target=128m
" > ${INITORA}
crsctl start resource ora.cssd
sqlplus /nolog <<EOF
connect / as sysasm
startup force nomount pfile=${INITORA};
shutdown abort;
exit;
EOF
srvctl add listener -l listener_ASM -o $ORACLE_HOME -p 1526
srvctl add asm -l listener_ASM -p ${INITORA}
srvctl start listener -l listener_ASM
srvctl start asm
srvctl stop asm -f
crsctl status resource -t
sqlplus /nolog <<EOF
connect / as sysasm
create spfile='${SPFILE}' from pfile='${INITORA}';
startup force;
show parameter pfile
shutdown abort;
exit;
EOF
srvctl modify asm -p ${SPFILE}
srvctl start asm
srvctl config asm
crsctl status resource -t
rm -f ${INITORA}
sqlplus /nolog <<EOF
connect / as sysasm
alter system set asm_diskstring='/dev/sd*' scope=both;
create diskgroup DB112_DATA_DG external redundancy
disk '/dev/sda1' name DB112_DATA_DG_VOL01
attribute
'au_size' = '4M'
, 'compatible.asm' = '11.2'
, 'compatible.rdbms' = '11.2'
;
create diskgroup DB112_ARCH_DG external redundancy
disk '/dev/sdb1' name DB112_ARCH_DG_VOL01
attribute
'au_size' = '4M'
, 'compatible.asm' = '11.2'
, 'compatible.rdbms' = '11.2'
;
exit;
EOF
As time goes by people report bugs for the oracle software. Some of them are critical, others not. Sooner or later you will come to the situation where you’ll have to patch your oracle software. The utility oracle uses to patch it’s software is called opatch. To avoid any issues with opatch always download the latest release from oracle support ( search for patch number: 6880880 and download ).
For this little demonstration we will apply the Patch Set Update one for the Grid Infratrucure. Note that this patch includes Patch Set Update 1 for the database software, too ( we will patch the database software in a future post ). If you did not transer the patchset and opatch to your Virtual Machine, now is the time to do so ( see here for a description on how to do it ).
As mentioned before, always bring your opatch to the latest release:
su - grid
cd /opt/oracle/stage
unzip p6880880_112000_Linux-x86-64.zip -d $ORACLE_HOME/
It is safe to answer “All” if the unzip utility ask to replace some files.
Extract the patch:
su - grid
cd /opt/oracle/stage
unzip p13348650_112030_LINUX.zip
The structure of the oracle patches is always the same. You will get subdirectories named with the patch number and the readme:
ls -la
drwxr-xr-x 4 grid oinstall      4096 Jan 14 17:08 13343438
drwxr-xr-x 5 grid oinstall      4096 Jan 14 17:08 13348650
-rw-r--r-- 1 grid oinstall       422 Jan 14 17:08 bundle.xml
-rw------- 1 grid oinstall 335597984 Mar 23 11:04 p13348650_112030_Linux-x86-64.zip
drwxr-xr-x 8 grid oinstall      4096 Sep 22  2011 grid
-rw-r--r-- 1 grid oinstall  32510817 Mar 23 10:54 p6880880_112000_Linux-x86-64.zip
-rw-rw-r-- 1 grid oinstall    107674 Jan 16 14:49 README.html
-rw-r--r-- 1 grid oinstall        21 Jan 14 17:08 README.txt
Make sure you carefully read the readme.
Applying the patch is straight forward ( Note that Patches to the Grid Infrastructure need to be applied as root ). The first thing to do is to check if the current oracle inventory is consistent:
su - grid
cd /opt/oracle/stage
export PATH=$ORACLE_HOME/OPatch:$PATH
opatch lsinventory -detail -oh $ORACLE_HOME
If your inventory is fine, you should see the following output:
Oracle Interim Patch Installer version 11.2.0.3.0
Copyright (c) 2012, Oracle Corporation.  All rights reserved.
Oracle Home       : /opt/oracle/product/crs/11.2.0.3
Central Inventory : /opt/oracle/oraInventory
   from           : /opt/oracle/product/crs/11.2.0.3/oraInst.loc
OPatch version    : 11.2.0.3.0
OUI version       : 11.2.0.3.0
Log file location : /opt/oracle/product/crs/11.2.0.3/cfgtoollogs/opatch/opatch2012-03-23_11-14-23AM_1.log
Lsinventory Output file location : /opt/oracle/product/crs/11.2.0.3/cfgtoollogs/opatch/lsinv/lsinventory2012-03-23_11-14-23AM.txt
--------------------------------------------------------------------------------
Installed Top-level Products (1):
Oracle Grid Infrastructure                                           11.2.0.3.0
There are 1 products installed in this Oracle Home.
Installed Products (88):
Agent Required Support Files                                         10.2.0.4.3
Assistant Common Files                                               11.2.0.3.0
Automatic Storage Management Assistant                               11.2.0.3.0
Bali Share                                                           1.1.18.0.0
Buildtools Common Files                                              11.2.0.3.0
Character Set Migration Utility                                      11.2.0.3.0
Cluster Ready Services Files                                         11.2.0.3.0
Cluster Verification Utility Common Files                            11.2.0.3.0
Cluster Verification Utility Files                                   11.2.0.3.0
Database SQL Scripts                                                 11.2.0.3.0
Deinstallation Tool                                                  11.2.0.3.0
Enterprise Manager Common Core Files                                 10.2.0.4.4
Enterprise Manager Common Files                                      10.2.0.4.3
Enterprise Manager plugin Common Files                               11.2.0.3.0
Expat libraries                                                       2.0.1.0.1
HAS Common Files                                                     11.2.0.3.0
HAS Files for DB                                                     11.2.0.3.0
Installation Common Files                                            11.2.0.3.0
Installation Plugin Files                                            11.2.0.3.0
Installer SDK Component                                              11.2.0.3.0
LDAP Required Support Files                                          11.2.0.3.0
OLAP SQL Scripts                                                     11.2.0.3.0
Oracle Clusterware RDBMS Files                                       11.2.0.3.0
Oracle Configuration Manager Deconfiguration                         10.3.1.0.0
Oracle Containers for Java                                           11.2.0.3.0
Oracle Core Required Support Files                                   11.2.0.3.0
Oracle Database 11g                                                  11.2.0.3.0
Oracle Database 11g Multimedia Files                                 11.2.0.3.0
Oracle Database Deconfiguration                                      11.2.0.3.0
Oracle Database User Interface                                       2.2.13.0.0
Oracle Database Utilities                                            11.2.0.3.0
Oracle DBCA Deconfiguration                                          11.2.0.3.0
Oracle Extended Windowing Toolkit                                    3.4.47.0.0
Oracle Globalization Support                                         11.2.0.3.0
Oracle Globalization Support                                         11.2.0.3.0
Oracle Grid Infrastructure                                           11.2.0.3.0
Oracle Help For Java                                                  4.2.9.0.0
Oracle Ice Browser                                                    5.2.3.6.0
Oracle Internet Directory Client                                     11.2.0.3.0
Oracle Java Client                                                   11.2.0.3.0
Oracle JDBC/OCI Instant Client                                       11.2.0.3.0
Oracle JDBC/THIN Interfaces                                          11.2.0.3.0
Oracle JFC Extended Windowing Toolkit                                4.2.36.0.0
Oracle JVM                                                           11.2.0.3.0
Oracle LDAP administration                                           11.2.0.3.0
Oracle Locale Builder                                                11.2.0.3.0
Oracle Multimedia                                                    11.2.0.3.0
Oracle Multimedia Client Option                                      11.2.0.3.0
Oracle Multimedia Java Advanced Imaging                              11.2.0.3.0
Oracle Multimedia Locator                                            11.2.0.3.0
Oracle Multimedia Locator RDBMS Files                                11.2.0.3.0
Oracle Net                                                           11.2.0.3.0
Oracle Net Listener                                                  11.2.0.3.0
Oracle Net Required Support Files                                    11.2.0.3.0
Oracle Netca Client                                                  11.2.0.3.0
Oracle Notification Service                                          11.2.0.3.0
Oracle Notification Service (eONS)                                   11.2.0.3.0
Oracle One-Off Patch Installer                                       11.2.0.1.7
Oracle Quality of Service Management (Client)                        11.2.0.3.0
Oracle Quality of Service Management (Server)                        11.2.0.3.0
Oracle RAC Deconfiguration                                           11.2.0.3.0
Oracle RAC Required Support Files-HAS                                11.2.0.3.0
Oracle Recovery Manager                                              11.2.0.3.0
Oracle Security Developer Tools                                      11.2.0.3.0
Oracle Text Required Support Files                                   11.2.0.3.0
Oracle Universal Installer                                           11.2.0.3.0
Oracle USM Deconfiguration                                           11.2.0.3.0
Oracle Wallet Manager                                                11.2.0.3.0
Parser Generator Required Support Files                              11.2.0.3.0
Perl Interpreter                                                     5.10.0.0.2
Perl Modules                                                         5.10.0.0.1
PL/SQL                                                               11.2.0.3.0
PL/SQL Embedded Gateway                                              11.2.0.3.0
Platform Required Support Files                                      11.2.0.3.0
Precompiler Required Support Files                                   11.2.0.3.0
RDBMS Required Support Files                                         11.2.0.3.0
RDBMS Required Support Files for Instant Client                      11.2.0.3.0
RDBMS Required Support Files Runtime                                 11.2.0.3.0
Required Support Files                                               11.2.0.3.0
Secure Socket Layer                                                  11.2.0.3.0
SQL*Plus                                                             11.2.0.3.0
SQL*Plus Files for Instant Client                                    11.2.0.3.0
SQL*Plus Required Support Files                                      11.2.0.3.0
SSL Required Support Files for InstantClient                         11.2.0.3.0
Sun JDK                                                             1.5.0.30.03
Universal Storage Manager Files                                      11.2.0.3.0
XDK Required Support Files                                           11.2.0.3.0
XML Parser for Java                                                  11.2.0.3.0
There are 88 products installed in this Oracle Home.
There are no Interim patches installed in this Oracle Home.
Make sure there are no conflicts with the patch you want to apply:
su - grid
cd /opt/oracle/stage
export PATH=$ORACLE_HOME/OPatch:$PATH
opatch prereq CheckConflictAgainstOHWithDetail -phBaseDir /opt/oracle/stage/13343438 -oh $ORACLE_HOME
As this is a fresh installation with no patches applied until now, you should see the following output:
Oracle Interim Patch Installer version 11.2.0.3.0
Copyright (c) 2012, Oracle Corporation.  All rights reserved.
PREREQ session
Oracle Home       : /opt/oracle/product/crs/11.2.0.3
Central Inventory : /opt/oracle/oraInventory
   from           : /opt/oracle/product/crs/11.2.0.3/oraInst.loc
OPatch version    : 11.2.0.3.0
OUI version       : 11.2.0.3.0
Log file location : /opt/oracle/product/crs/11.2.0.3/cfgtoollogs/opatch/opatch2012-03-23_11-24-51AM_1.log
Invoking prereq "checkconflictagainstohwithdetail"
Prereq "checkConflictAgainstOHWithDetail" passed.
OPatch succeeded.
Because we want an automated patch installation without repsonding to the questions we create a response file for opatch now:
su - grid
export PATH=$ORACLE_HOME/OPatch:$PATH
$ORACLE_HOME/OPatch/ocm/bin/emocmrsp -output /opt/oracle/stage/opatch_response.rsp -no_banner
You do not need to provide an email address, just respond “Y” to the question that follows.
Time to apply the patch:
su -
cd /opt/oracle/stage
export PATH=/opt/oracle/product/crs/11.2.0.3/OPatch:$PATH
opatch auto /opt/oracle/stage -oh /opt/oracle/product/crs/11.2.0.3 -ocmrf /opt/oracle/stage/opatch_response.rsp
The output, if successful, looks like:
Executing /usr/bin/perl /opt/oracle/product/crs/11.2.0.3/OPatch/crs/patch112.pl -patchdir /opt/oracle -patchn stage -oh /opt/oracle/product/crs/11.2.0.3 -ocmrf /opt/oracle/stage/opatch_response.rsp -paramfile /opt/oracle/product/crs/11.2.0.3/crs/install/crsconfig_params
opatch auto log file location is /opt/oracle/product/crs/11.2.0.3/OPatch/crs/../../cfgtoollogs/opatchauto2012-03-23_11-34-03.log
Detected Oracle Restart install
Using configuration parameter file: /opt/oracle/product/crs/11.2.0.3/crs/install/crsconfig_params
Successfully unlock /opt/oracle/product/crs/11.2.0.3
patch /opt/oracle/stage/13348650  apply successful for home  /opt/oracle/product/crs/11.2.0.3
patch /opt/oracle/stage/13343438  apply successful for home  /opt/oracle/product/crs/11.2.0.3
ACFS-9459: ADVM/ACFS is not supported on this OS version: 'centos-release-5-8.el5.centos'
CRS-4123: Oracle High Availability Services has been started.
As CentOS is not a supported platform, you can ignore the ACFS-9459 message. Be aware that the Cluster Stack will get restarted.
Can can recheck your inventory now to be sure the patch has been applied:
su - grid
export PATH=$ORACLE_HOME/OPatch:$PATH
opatch lsinventory -details
Make a reboot test, to be sure everything is working:
su -
reboot
Login again and check the cluster stack:
su - grid
crsstat
Again, remember to take a snapshot of your Virtual Machine if you want to save your work or if you want to revert to this point. Delete the source files if you do not want to become your Virtual Machine too big before:
su - grid
cd /opt/oracle/stage/
rm -rf 13343438/ 13348650/ bundle.xml README.html README.txt
We will keep the zips and the response file for database patching in one of the next posts.
On your workstation create the snapshot:
vboxmanage snapshot oracleplayground take "after gi patch"
The OS is prepared and everything is configured. Time to come to the first part of the installation: Oracle Grid Infrastructure
If you did not already transfer the source files to your Virtual Machine do it now. If your workstation runs on linux, here is an example:
scp -P 3000 p10404530_112030_Linux-x86-64_1of7.zip grid@localhost:/opt/oracle/stage
scp -P 3000 p10404530_112030_Linux-x86-64_2of7.zip grid@localhost:/opt/oracle/stage
scp -P 3000 p10404530_112030_Linux-x86-64_3of7.zip grid@localhost:/opt/oracle/stage
scp -P 3000 p13348650_112030_LINUX.zip grid@localhost:/opt/oracle/stage
Windows users may use tools like winscp, filezilla or cygwin to name a few of it.
As the Grid Infrastructure will be installed under the “grid” user, establish a ssh connection to your Virtual Machine and do the installation ( we will do a software only installation here, nothing will be configured for the moment ):
su - grid
cd /opt/oracle/stage
unzip p10404530_112030_Linux-x86-64_3of7.zip
cd grid
./runInstaller \
INVENTORY_LOCATION=/opt/oracle/oraInventory \
SELECTED_LANGUAGES=en \
oracle.install.option=CRS_SWONLY \
ORACLE_BASE=/opt/oracle/product/base \
ORACLE_HOME=/opt/oracle/product/crs/11.2.0.3 \
ORACLE_HOME_NAME=HCRS112030 \
UNIX_GROUP_NAME=oinstall \
oracle.install.asm.OSDBA=asmdba \
oracle.install.asm.OSASM=asmadmin \
FROM_LOCATION=../stage/products.xml \
DECLINE_SECURITY_UPDATES=true \
-ignoreSysPrereqs \
-ignorePrereq \
-waitforcompletion \
-silent
su -
/opt/oracle/oraInventory/orainstRoot.sh
/opt/oracle/product/crs/11.2.0.3/root.sh
That’s it for the software installation. Surprised ? The most important thing to remember if installing oracle software is: Read the installation guides and fulfill all the requirements. If you do this, the installation will be fast and easy.
Some explanations for the above commands:
- runInstaller: this is oracle installer on linux/unix ( it is setup.exe on windows )
- INVENTORY_LOCATION: the location where you want to store the central oracle inventory
- SELECTED_LANGUAGES: the languages you want to install for the product
- oracle.install.option: how do you want to install ( CRS_SWONLY is for installing the software, but do not configure anything )
- ORACLE_BASE: the location you want to use for the $ORACLE_BASE
- ORACLE_HOME: the location where you want to install the product, this is the $ORACLE_HOME
- UNIX_GROUP_NAME: the OS group you want to own the installed software
- oracle.install.asm.OSDBA: the OS group you want to use as asm dba
- oracle.install.asm.OSASM: the OS group you want to use for sysasm
- FROM_LOCATION: references the xml where all the products are defined
- DECLINE_SECURITY_UPDATES: true means: do not try to connect to oracle support for downloading the latest patches
- -ignoreSysPrereqs: ignore the system prerequisites
- -ignorePrereq: ignore all the other prerequisites
- -waitforcompletion: wait until the installation completes before returning to the shell
- -silent: do a silent installation ( do not use the graphical mode )
Take a look at the sample response file if you want to learn about all the other options you can use ( /opt/oracle/stage/grid/response/grid_install.rsp ).
The root scripts:
- /opt/oracle/oraInventory/orainstRoot.sh : Creates the pointer to the oraInventory and sets the correct permissions
- /opt/oracle/product/crs/11.2.0.3/root.sh: Calls various other scripts to set up the installation
Lets see if if everything works as expected and configure the cluster stack for single node ( The Grid Infrastructure sofware is exactly the same for Cluster and Single Node installations. For single node installations, oracle calls this “Oracle Restart” ):
su -
/opt/oracle/product/crs/11.2.0.3/crs/install/roothas.pl
The output should like this:
[root@oracleplayground stage]# /opt/oracle/product/crs/11.2.0.3/crs/install/roothas.pl
Using configuration parameter file: /opt/oracle/product/crs/11.2.0.3/crs/install/crsconfig_params
Creating trace directory
User ignored Prerequisites during installation
LOCAL ADD MODE
Creating OCR keys for user 'grid', privgrp 'oinstall'..
Operation successful.
LOCAL ONLY MODE
Successfully accumulated necessary OCR keys.
Creating OCR keys for user 'root', privgrp 'root'..
Operation successful.
CRS-4664: Node oracleplayground successfully pinned.
Adding Clusterware entries to inittab
oracleplayground 2012/03/23 09:18:15 /opt/oracle/product/crs/11.2.0.3/cdata/oracleplayground/backup_20120323_091815.olr
Successfully configured Oracle Grid Infrastructure for a Standalone Server
If you had troubles you can deconfigure the whole stack and try again:
su -
/opt/oracle/product/crs/11.2.0.3/crs/install/roothas.pl -deconfig -force
### check the logfiles ( $ORACLE_HOME/log/oracleplayground/* ) for the issue and try to configure again
/opt/oracle/product/crs/11.2.0.3/crs/install/roothas.pl
There is one important thing to note: Take a look at this line:
Using configuration parameter file: /opt/oracle/product/crs/11.2.0.3/crs/install/crsconfig_params
This is the one and only configuration file you will need to adjust if setting up the stack for a cluster ( If you want to configure for a cluster rootcrs.pl will be used instead of roothas.pl, but the configuration file keeps the same ).
In our case we do not need to modify it, as we will work with a single node.
What happened here:
The script created same trace directories, the olr ( oracle local registry ), pinned the node and added a call to inittab. Can verify this with:
cat /etc/inittab | grep ohas
If you take a look at your processes now, you’ll notice that several oracle processes started up:
ps -ef | grep ora
This are the basic cluster stack processes which will manage you oracle infrastructure.
- ohasd.bin: the process resonsible for starting up all the cluster processes
- oraagent.bin: will spawn agents to start resources
- evmd.bin: the event volume manager daemon
- evmlogger.bin: spawned by evmd to log events
To make a life a bit easier for us, lets define some aliases and environment variables for the grid user:
su - grid
echo "ORACLE_HOME=/opt/oracle/product/crs/11.2.0.3
ORACLE_BASE=/opt/oracle/base
ORACLE_SID=+ASM
PATH=$ORACLE_HOME/bin:$PATH
LD_LIBRARY_PATH=$ORACLE_HOME/lib:$LD_LIBRARY_PATH
PS1='\[33[1;34m\]${ORACLE_SID}\[33[1;33m\]@\[33[1;32m\]`uname -n`\[33[0m\] $LOGNAME:$PWD $ '
export ORACLE_HOME ORACLE_BASE ORACLE_SID PATH LD_LIBRARY_PATH PS1
alias crsstat='crsctl status resource -t'" >> ~/.bash_profile
It is a good idea to reboot your Virtual Machine now and to check if the cluster stack comes up again.
su -
reboot
Once the Virtual Machine is up and running again ( notice that it will take some time for the oracle processes to come up ), verify if you can interact with the stack ( we will use the alias defined above for this ):
su - grid
crsstat
If everything is fine, the output should like this:
--------------------------------------------------------------------------------
NAME TARGET STATE SERVER STATE_DETAILS
--------------------------------------------------------------------------------
Local Resources
--------------------------------------------------------------------------------
ora.ons
OFFLINE OFFLINE oracleplayground
--------------------------------------------------------------------------------
Cluster Resources
--------------------------------------------------------------------------------
ora.cssd
1 OFFLINE OFFLINE
ora.diskmon
1 OFFLINE OFFLINE
ora.evmd
1 ONLINE ONLINE oracleplayground
To summarize: We installed the Grid Infrastructure software without doing any configuration initially and executed the root scripts for setting up permissions, the oracle inventory and the grid infrastructure software. roothas.pl did the configuration of the cluster stack, added an entry to the inittab and generated the oracle local registry. We did a reboot to check if everything comes up again and defined some environment variables and aliases to make life a bit easier for us.
If you’ll ask yourself what the crsctl is for: We will come back to all the commands in next posts and introduce them when appropriate.
In the next post we will apply the first patch to the grid infrastructure and will learn about the oracle patch utility opatch.
Again, remember to take a snapshot of your Virtual Machine if you want to save your work or if you want to revert to this point. Delete the source files if you do not want to become your Virtual Machine too big before:
su - grid
cd /opt/oracle/stage/
rm -rf grid/ p10404530_112030_Linux-x86-64_3of7.zip
On your workstation create the snapshot:
vboxmanage snapshot oracleplayground take "after gi installation and configuration"
We did the initial operating system setup in the last post. Before we can install the oracle software we need to prepare the operating system for oracle. I will assume your Virtual Machine is up and running and you have a working ssh connection established to it ( as user root ).
Because it is a training environment turn off the firewall and selinux
chkconfig iptables off
service iptables stop
vi /etc/sysconfig/selinux
## SELINUX=disabled
The first requirement we need to fulfill is to install all the software packages oracle requires to successfully install. A list of the packages can be found in the oracle documentation.
yum install -y binutils compat-libstdc++-33 elfutils-libelf elfutils-libelf-devel gcc gcc-c++ glibc glibc-common glibc-devel glibc-headers ksh libaio libaio-devel libgcc libstdc++ libstdc++-devel make sysstat libcap openssh-clients unzip numactl man-pages man
Documentation links:
- For binutils: http://www.gnu.org
- For compat-libstdc++, gcc, gcc++, libgcc, libstdc++, libstdc++-devel : gcc.gnu.org
- For elfutils: fedorahosted.org
- For glibc, glibc-common, glibc-devel, glibc-headers: www.gnu.org
- For ksh: www.kornshell.com
- For libaio, libaio-devel: sourceforge.net
- For make: www.gnu.org
- For sysstat: sebastien.godard.pagesperso-orange.fr
- For libcap, compat-libcap1: www.tcpdump.org
- openssh: www.openssh.com/
- numactl : http://www.sharcnet.ca/
Next we need to set the kernel parameters ( again, see the documentation for details ):
echo "fs.file-max = 6815744
fs.aio-max-nr = 1048576
net.core.wmem_max = 1048576
net.ipv4.ip_local_port_range = 1024 65000
net.core.wmem_default = 262144
net.core.wmem_max = 1048576
net.core.rmem_default = 262144
net.core.rmem_max = 4194304
kernel.sem = 250 32000 32 1024 " >> /etc/sysctl.conf
/sbin/sysctl -p
For an excellent description of the shared memory parameters take a look at orafaq
As oracle will run under it’s own user accounts and groups we need to define them ( again, see the documentation for details )
/usr/sbin/groupadd -g 501 oinstall
/usr/sbin/groupadd -g 502 dba
/usr/sbin/groupadd -g 503 oper
/usr/sbin/groupadd -g 504 asmadmin
/usr/sbin/groupadd -g 506 asmdba
/usr/sbin/groupadd -g 505 asmoper
/usr/sbin/useradd -u 502 -g oinstall -G asmadmin,asmdba,asmoper,dba -m -c "Grid Infratructure Software owner" grid
/usr/sbin/useradd -u 503 -g oinstall -G dba,oper,asmdba,asmadmin -m -c "Database Software owner" oracle
passwd oracle
passwd grid
Because Oracle will need resources from the OS, lets set the resource limits ( again, see the documentation for details )
echo "oracle soft nproc 2047
oracle hard nproc 16384
oracle soft nofile 1024
oracle hard nofile 65536
oracle soft stack 10240
grid soft nproc 2047
grid hard nproc 16384
grid soft nofile 1024
grid hard nofile 65536
grid soft stack 10240
grid hard stack 32768" >> /etc/security/limits.conf
Make sure we have a correct hosts entry:
echo "10.0.2.15 oracleplayground oracleplayground.fun" >> /etc/hosts
Almost finished. What’s still missing are the directories for the Oracle Inventory ( the central location where oracle records the products installed ) and the software locations. For a description see the documentation.
Note: As this will be a training environment we will not create separate mount points as you would do on a production system.
mkdir /opt/oracle
mkdir /opt/oracle/stage
mkdir /opt/oracle/product
mkdir /opt/oracle/oraInventory
mkdir /opt/oracle/product/base
mkdir /opt/oracle/product/crs
chown grid:oinstall /opt/oracle
chown grid:oinstall /opt/oracle/stage
chown grid:oinstall /opt/oracle/product
chown grid:oinstall /opt/oracle/oraInventory
chown grid:oinstall /opt/oracle/product/crs
chown oracle:oinstall /opt/oracle/product/base
chmod 770 /opt/oracle
chmod 770 /opt/oracle/stage
chmod 770 /opt/oracle/oraInventory
chmod 770 /opt/oracle/product
chmod 770 /opt/oracle/product/base
That’s it. The OS is ready for the oracle installation.
To be prepared for the next step, you’ll need to download the below files from oracle support. On the “Patches and Updates” tab search for patches 10404530 and 13348650.
- p10404530_112030_Linux-x86-64_1of7.zip: Oracle Database 11gR2 11.2.0.3 Part 1 of 2
- p10404530_112030_Linux-x86-64_2of7.zip: Oracle Database 11gR2 11.2.0.3 Part 2 of 2
- p10404530_112030_Linux-x86-64_3of7.zip: Oracle Grid Infrastructure 11gR2 11.2.0.3 Part 1 of 1
- p13348650_112030_LINUX.zip: Oracle Grid Infrastructure Patchset Update 11.2.0.3.1 ( includes database PSU )
If you do not have an oracle support account you can go with the base release ( 11.2.0.1.0 ) which can be downloaded from Oracle Technology Network. The procedure for installing the software remains the same but you will not be able apply the PSU ( Patch Set Update ) from above.
For your convenience or if you’d like to automate the tasks performed in this post, here is the complete script:
#!/bin/bash
if [ $(id -un) != "root" ]; then
echo "you must run this as root"
exit 0
fi
# install the required software
yum install -y binutils compat-libstdc++-33 elfutils-libelf elfutils-libelf-devel gcc gcc-c++ glibc glibc-common glibc-devel glibc-headers ksh libaio libaio-devel libgcc libstdc++ libstdc++-devel make sysstat libcap openssh-clients unzip numactl man-pages man
# set the kernel parameters
echo "fs.file-max = 6815744
fs.aio-max-nr = 1048576
net.core.wmem_max = 1048576
net.ipv4.ip_local_port_range = 1024 65000
net.core.wmem_default = 262144
net.core.wmem_max = 1048576
net.core.rmem_default = 262144
net.core.rmem_max = 4194304
kernel.sem = 250 32000 32 1024 " >> /etc/sysctl.conf
/sbin/sysctl -p
# add groups and users
/usr/sbin/groupadd -g 501 oinstall
/usr/sbin/groupadd -g 502 dba
/usr/sbin/groupadd -g 503 oper
/usr/sbin/groupadd -g 504 asmadmin
/usr/sbin/groupadd -g 506 asmdba
/usr/sbin/groupadd -g 505 asmoper
/usr/sbin/useradd -u 502 -g oinstall -G asmadmin,asmdba,asmoper,dba -m -c "Grid Infratructure Software owner" grid
/usr/sbin/useradd -u 503 -g oinstall -G dba,oper -m -c "Database Software owner" oracle
passwd oracle
passwd grid
# set the resource limits
echo "oracle soft nproc 2047
oracle hard nproc 16384
oracle soft nofile 1024
oracle hard nofile 65536
oracle soft stack 10240
grid soft nproc 2047
grid hard nproc 16384
grid soft nofile 1024
grid hard nofile 65536
grid soft stack 10240
grid hard stack 32768" >> /etc/security/limits.conf
# create the directories
mkdir /opt/oracle
mkdir /opt/oracle/stage
mkdir /opt/oracle/product
mkdir /opt/oracle/oraInventory
mkdir /opt/oracle/product/base
mkdir /opt/oracle/product/crs
chown grid:oinstall /opt/oracle
chown grid:oinstall /opt/oracle/stage
chown grid:oinstall /opt/oracle/product
chown grid:oinstall /opt/oracle/oraInventory
chown grid:oinstall /opt/oracle/product/crs
chown oracle:oinstall /opt/oracle/product/base
chmod 770 /opt/oracle
chmod 770 /opt/oracle/stage
chmod 770 /opt/oracle/oraInventory
chmod 770 /opt/oracle/product
chmod 770 /opt/oracle/product/base
Remember to take a snapshot of your Virtual Machine if you want to save your work or if you want to revert to this point:
vboxmanage snapshot oracleplayground take "after OS configuration"
… and as a dba you should have an understanding on how the operation works and what needs to be configured.
The first thing you need to do if you want to install oracle software is to prepare your operating system. For the little series I will use CentOS 5.8 x86_64 because it’s free and compatible to RedHat and Oracle Linux.
What you will need:
- The Virtual Box Software for your Operating System ( Virtual Box Website ), in my case 4.1.10
- The CentOS installation ISO ( CentOS download ), in my case 5.8 x86_64
If you prefer VMWare or any other virtualization software you can do so. Just make sure to create a new Virtual Machine that matches the one created here.
Once you have installed the VirtualBox software you are ready to create new Virtual Machine. The first steps will show the command line usage for creating the Virtual Machine and mostly will go with the defaults options. For documenting the OS setup itself i decided to provide the screen-shots as automating the OS setup is not in scope of this post.
Note: Everything shown for the command line can be done with the GUI, too. I personally prefer the command line as it is easier to document and faster once you’re common with the syntax.
If you have any questions on the commands used below, please take a look at the Virtual Box documentation.
Create a new CentOS 64bit Virtual Machine and name it oracleplayground ( or whatever name you like, just make sure you replace oracleplayground with the name of your choice in the below commands ):
vboxmanage createvm --name oracleplayground --ostype redhat_64 --register
Modify the VM to use 1512 mb of memory:
vboxmanage modifyvm oracleplayground --memory 1512
Create a new virtual hard disk which will contain the OS and the oracle software ( you can specify any location you like for the –filename parameter ):
vboxmanage createhd --filename ~/VirtualBox\ VMs/oracleplayground/oracleplayground_dh1.vdi --size=30720
Create a new virtual storage controller:
vboxmanage storagectl oracleplayground --name "IDE Controller" --add ide --controller PIIX4
Attach the virtual hard disk to the newly created virtual controller:
vboxmanage storageattach oracleplayground --storagectl "IDE Controller" --port 1 --device 0 --type hdd --medium ~/VirtualBox\ VMs/oracleplayground/oracleplayground_dh1.vdi
Attach the Centos Linux ISO to the virtual machine:
vboxmanage storageattach oracleplayground --storagectl "IDE Controller" --port 1 --device 1 --type dvddrive --medium ~/Downloads/CentOS-5.8-x86_64-bin-DVD-1of2.iso
As we will use NAT for the Virtual Machine we need to configure port-forwarding. This enables us to connect to the VM using ssh once the operating system is installed. This command will forward all requests to your workstation on Port 3000 to the VMs Port 22 ( the default port the ssh daemon listens on ):
vboxmanage modifyvm "oracleplayground" --natpf1 "guestssh,tcp,,3000,,22"
Finally start the VM:
vboxmanage startvm oracleplayground
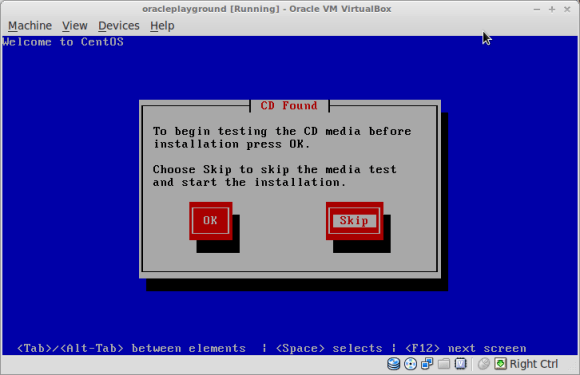
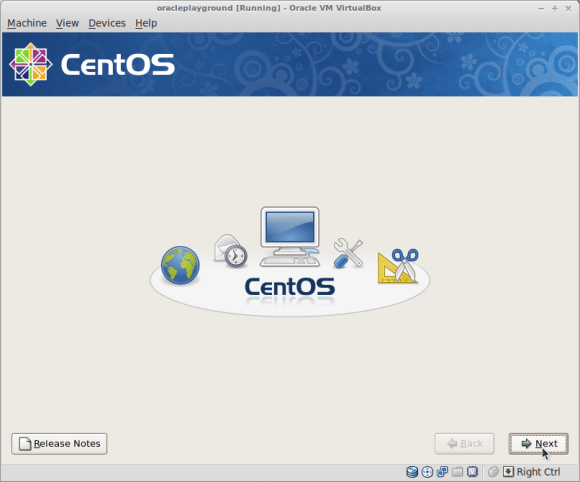
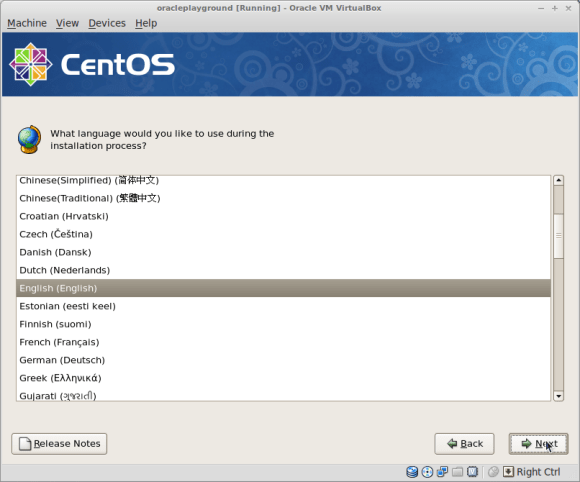
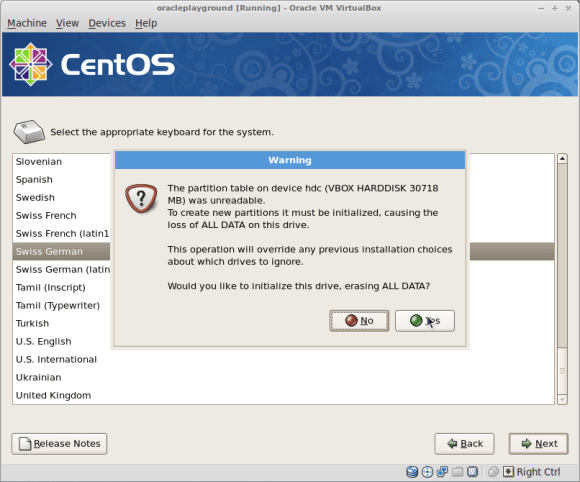
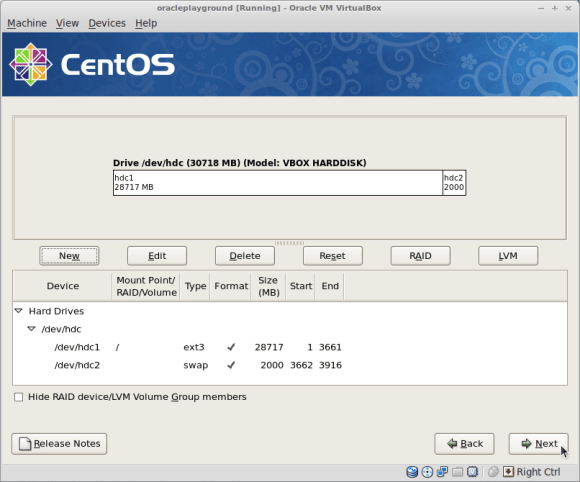
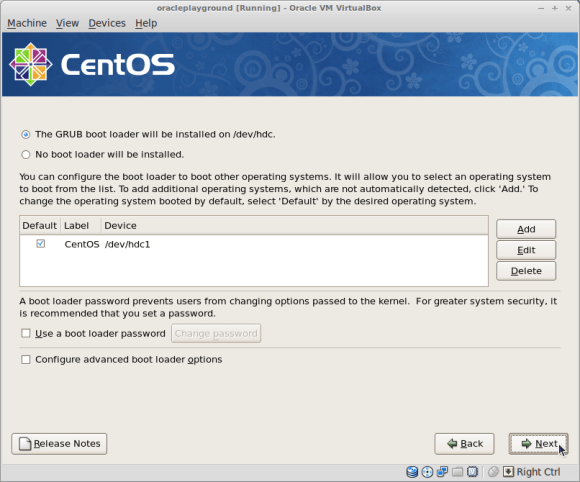
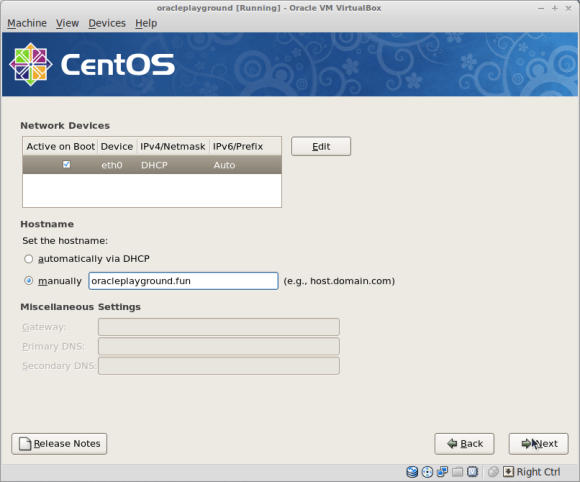
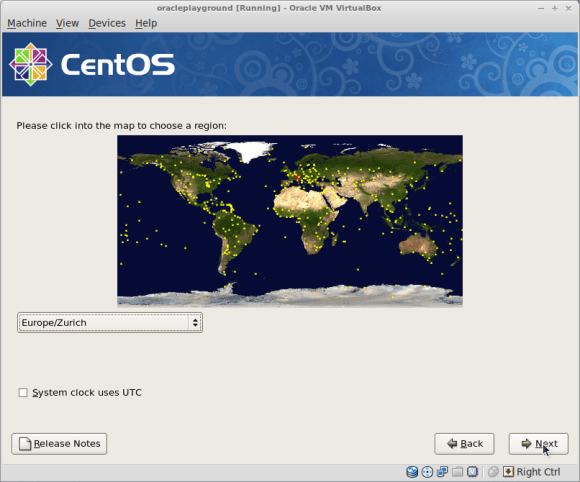
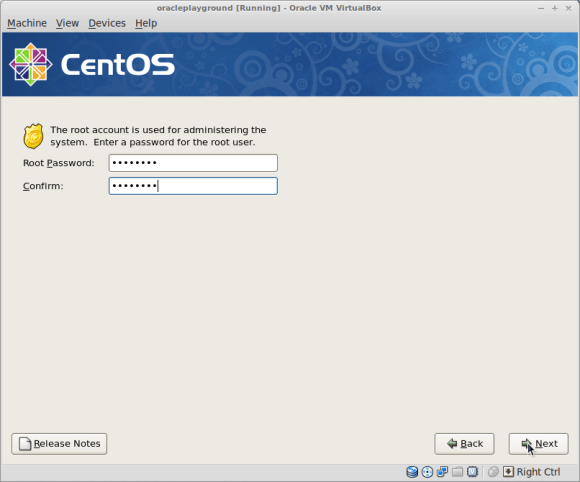
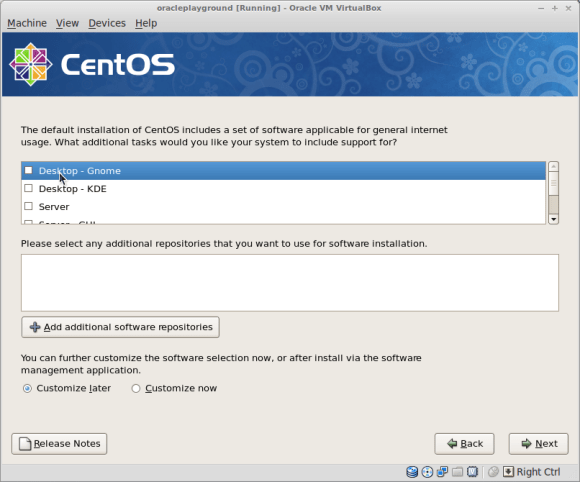
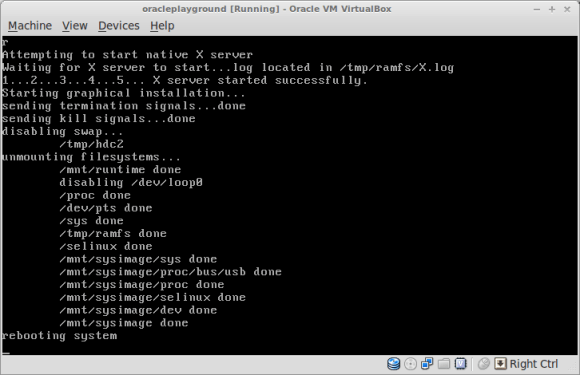
From this point onwards there will be some screen-shots to document the OS setup ( You would use tools like kickstart for installating a qualified server ).
Note: If your cursor is catched inside the Virtual Machine window you can use the “right CRTL” key to return to your workstation.


This was the last screenshot and for all remaining task I assume you’re logged in as root and provide the command line usage to proceed:
From now on you should be able to login through ssh. If you workstation runs on Linux/Solaris/OS X this should get you the connection:
ssh -o Port=3000 root@localhost
If you are working on windows, here is the putty example:
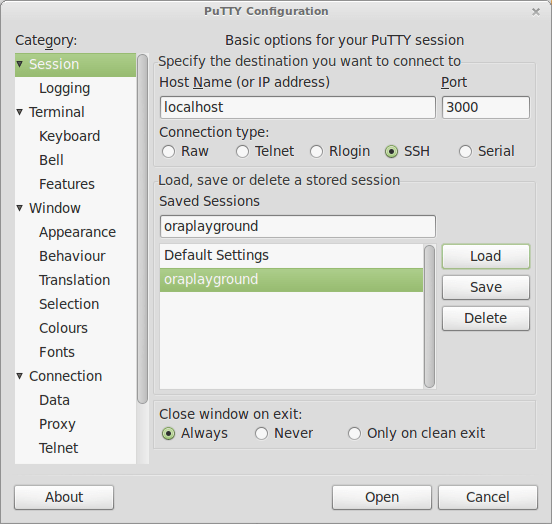
If you want to bring your system up to date now, you can use yum to download and install the latest patches:
Do not forget to set the proxy, if you need to use one ( btw. you can permanently set the proxy for yum in /etc/yum.conf ):
export http_proxy=proxy.yourdomain.com:8080
Update the system to the latest patchlevel:
yum update
Now is the perfect time to take a snapshot of your Virtual Machine. This will be very helpful in case you want to come back to this point later or if you damage your VM during one of the next steps. Reverting a snapshot takes minutes, doing all the work above again takes hours.
On your workstation take a snapshot of the Virtual Machine:
vboxmanage snapshot oracleplayground take "after OS installation"
If you want to export the Virtual Machine as appliance, you can do this, too. Appliances are useful if you want to import the whole Virtual Machine to a new one or if you want to transfer it to a another workstation.
vboxmanage export "oracleplayground" --output oracleplayground.ovf
For importing it ( on the same or any other host ):
vboxmanage import "oracleplayground.ovf"
That’s it for the basic Operating System setup. The next post will be about the various configuration tasks that need to be done before we may start installing the oracle software.
